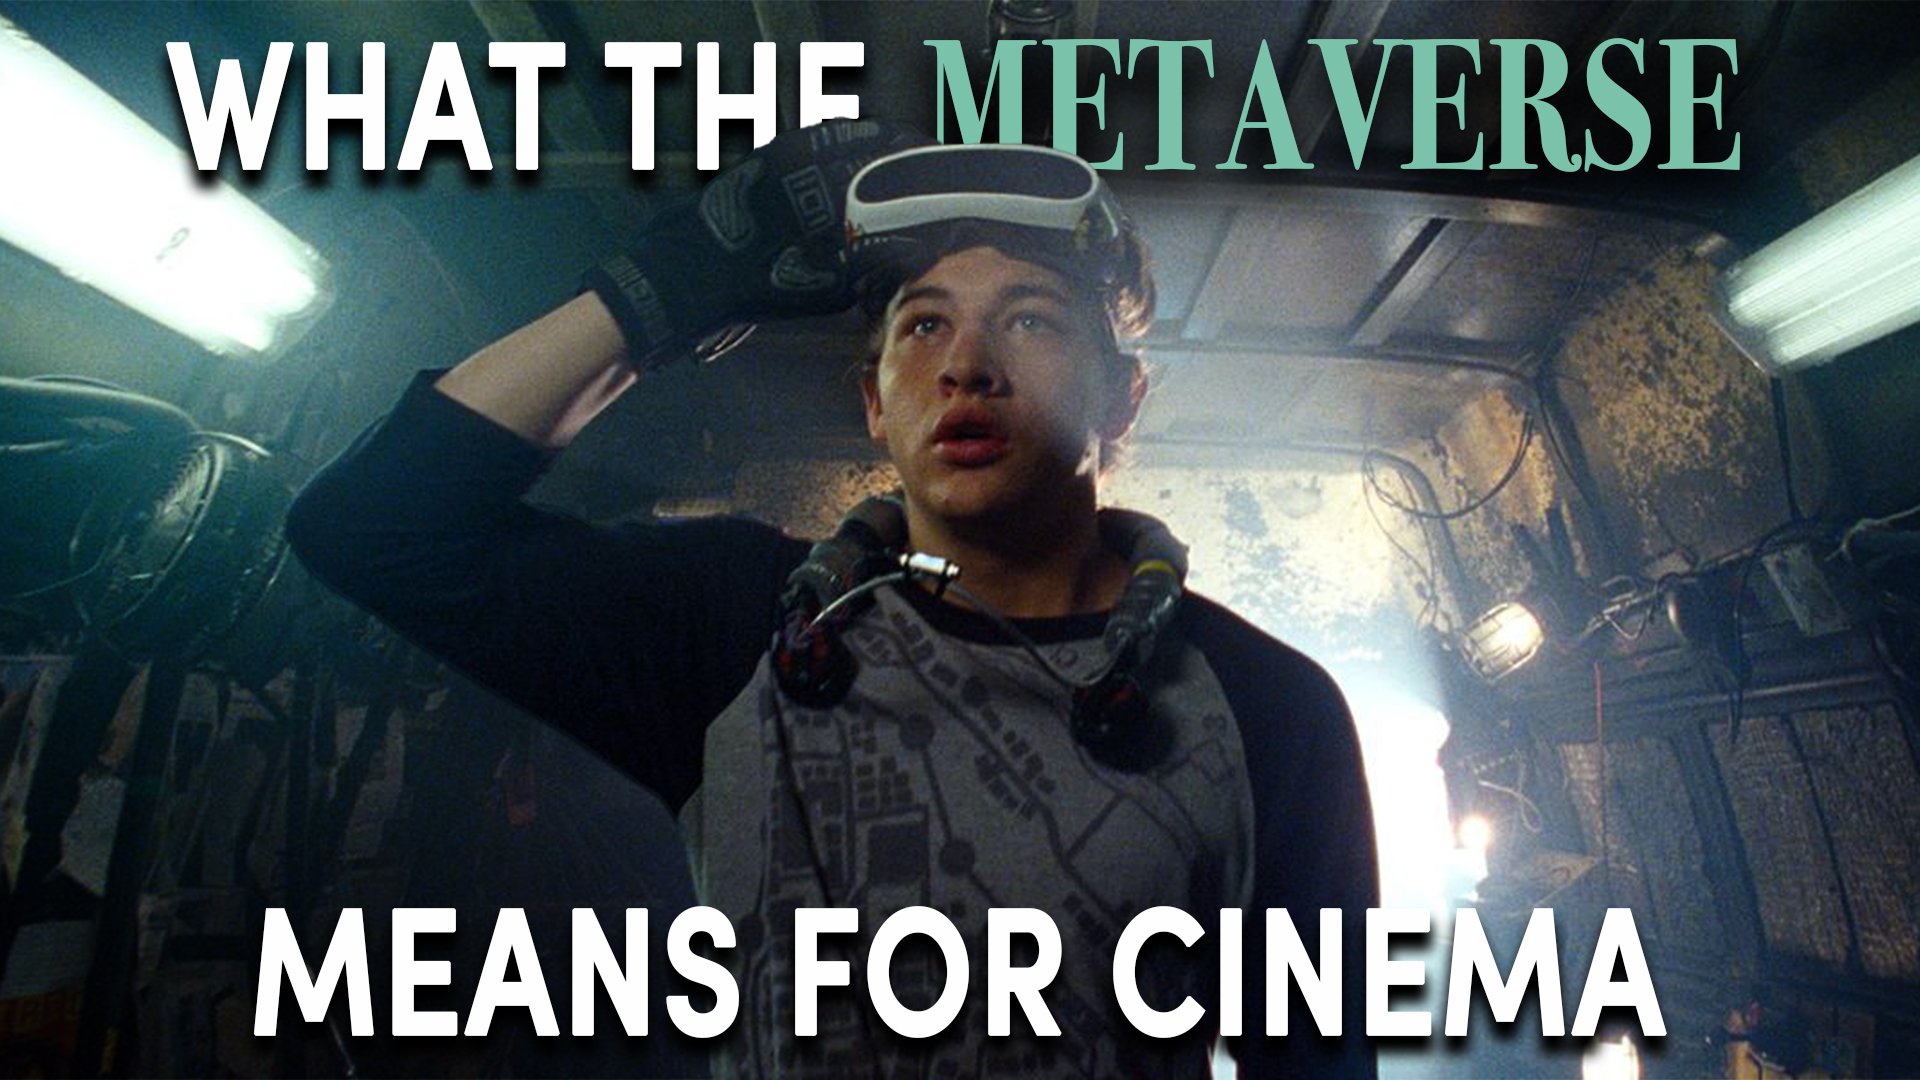
What The Metaverse Means For The Future Of Cinema
In this video I’m going to do some speculating and take you through what the metaverse is and the potential impact I think it may have on the future of cinema and on visual communication.

INTRODUCTION
Visual communication as an industry has rapidly expanded over the past few decades. This is partly due to the internet providing more platforms for visual art to be viewed and interacted with, as well as increasing access to technology tearing down obstacles in the way of producing art.
Just over 10 years ago if you wanted to make a documentary it required using large and expensive, clunky broadcast cameras, highly expensive film stock, or low fidelity DV cameras. Once it was eventually made you then had to find a TV broadcaster willing to screen it, and if you were lucky enough to sell it, you’d need more luck just to break even on your costs of producing the documentary.
Now, people can pick up a consumer mirrorless camera, or even a phone, and get an amazing image right out of the box, then distribute the final film any number of ways online.
But what does this have to do with the metaverse?
Well, in a similar way that inexpensive digital cameras and the internet transformed the possibilities of documentary filmmaking, I think the metaverse could also have an enormous effect on how films and visual media are made, distributed and interacted with in the future.
In this video I’m going to do some speculating and take you through what the metaverse is and the potential impact I think it may have on the future of cinema and on visual communication.
WHAT IS THE METAVERSE?
On the 28th of October 2021, Facebook announced their intention to devote a huge amount of resources towards creating their version of the metaverse, signaling their intent by even renaming their holding company Meta.
Whether this bodes well or poorly for the future, one of the biggest companies in the world throwing all their chips into the metaverse pot is significant.
So what exactly is the metaverse?
“You’re going to be able to bring things from the physical world into the metaverse. Almost any type of media that can be represented digitally: photos, video, art, music, movies, music, books, games, you name it.” - Mark Zuckerberg
The metaverse is a space created on the internet which uses 3-D virtual environments. While it is still in its infancy, the metaverse involves integration between virtual and physical spaces. So people interacting in this environment will be able to create their own avatar or character that represents them, place that avatar in a virtual space, manipulate them with hardware like VR tools and effectively live a life in this space that includes consuming a variety of art forms and visual entertainment - including films.
The metaverse that Meta is currently developing will likely use a motion capture system, such as the Oculus (owned by...you guessed it...Meta), to allow players to explore the online space and interact with user generated content.
There’s definitely the possibility for filmmaking to exist and be incorporated into this future online world. But also, I think the core skill of filmmaking, which is visual communication, is already being used in developing the metaverse, whether through virtual reality, augmented reality or gaming.
WHAT THE METAVERSE MEANS FOR FILMMAKING?
So how will the metaverse change the way that movies are produced?
To understand this I think we need to know the four main categories that largely determine the cost of producing a film: sets, actors, crew and gear. The metaverse holds the potential to remove or change all of these boundaries.
Let’s start with sets. In the Metaverse, with a little bit of programming, you can create whatever location you want. In real life you may not be able to block off three avenues in New York to shoot your student film, but in the Metaverse any location you can imagine could become a reality.
Secondly, actors could be replaced with avatars representing any form. Or, actors could still be captured in real life and then placed within a 3-D virtual environment.
Third, crew. The only crew you’ll need are people to capture any live action footage and a team of programmers to do the post production digital grunt work. The hundreds of on set crew members needed for larger productions will be greatly reduced since, well...there won’t be sets.
And fourth, gear. Far more minimal camera and lighting gear will be needed to capture live action. Rather than lighting an entire space, now all that needs to be lit is a character and a green screen. Expensive gear that was once used for the bulk of capturing the footage will now be replaced by computers.
So it may seem that all of these prohibitive boundaries that there once were to make a movie will now dissolve and anyone will be able to produce a blockbuster from the comfort of their own home.
I think this yields interesting opportunities. Just as cheaper digital cameras, editing software and an increase in distribution platforms had an impact on how documentaries are made, I think this jump in metaverse technology has the potential to yield similar possibilities in visual communication.
However, I also can’t help but also be a bit sceptical.
While certain live action aspects of filmmaking, such as sets and actors, may move into the virtual space, it won’t exactly be cheap to make movies. I think celebrity actors will continue to be in demand for their ability to attract an audience and will continue to be paid premium rates whether their performance is in the real or virtual world.
I also think that many of the costs saved on crew, gear and locations will just be re-allocated to hiring a large team of programmers and designers to create the virtual movie - similar to how large budget games are produced.
In the end, when it comes to mass entertainment I still think the same players will dominate. The people who are going to be able to produce the highest-end films will still be the production companies with the largest budget, greatest resources and marketing power.
To remain on the cutting edge of technology, to employ the most talented filmmakers or artists and to promote the end product will always take a lot of money - whether in the real world or the metaverse.
While I think the metaverse and virtual reality filmmaking has many exciting possibilities and may change the landscape of independent filmmaking through creative user generated content, I think that the space of mass entertainment will continue to be dominated by the production companies that are able to spend the most money.
WHY DOES IT MATTER?
So why does it matter to those who are working, studying or interested in film and what impact will it have on them?
Although what I’m suggesting is hypothetical, we can already find practical examples of film production companies working in this virtual space. Visual effects companies such as Digital Domain, founded by James Cameron, are increasingly producing more and more work, such as characters, in the VR and AR space.
While the transition for those who occupy roles in the visual effects and post production side of the film industry is relatively straightforward, what does it mean for other crew members who are used to applying their trade in a two dimensional world - like a cinematographer for instance.
As we transition into this new virtual space there will be a period where capturing the real world will be incorporated with visual effects work. This is actually a job that cinematographers are already performing. Almost every film that is produced nowadays includes some degree of visual effects work incorporated with live action cinematography. Combining traditional photographic skills for capturing images, along with more conceptual skills is already a necessity for most DPs.
For example, Bradford Young was tasked with combining these skills when shooting Arrival.
“It was on us to determine the tenor of the visual effects. The visual effects aren’t going to determine how we make the film. We make the film and the visual effects come into play later.” - Bradford Young, Cinematographer
On Arrival the creative team decided on a set of rules when filming the live action, such as keeping the focus on the character in the foreground.
“We never threw focus or rarely threw focus to effects or a CG element. You know, we always kept it in the foreground. If we had four or five added helicopters we wouldn’t throw focus there and say ‘Hey, this is real!’...The film is not about that. The film is about what is happening in front of us.” - Bradford Young, Cinematographer
To me it would be sad to see sit-down cinema as we know it disappear in the metaverse (never mind the potential negative social effects the metaverse might have on the population at large). But one thing we can never escape from is that art is always changing.
Cinematographers of the future will be faced with tools for creating in the virtual world that may have been impossible before in the physical 2-D realm.
For example, even now with visual effects it is possible for cinematographers to shape light in a way that would have been otherwise impractical without digital help.
“We get out in these situations where we have a long walk and talk. Because of the environment that we’re in and because of the tools we have...people don’t walk with a 12x12 negative fill the whole walk. But when we do visual effects, we forget that it’s a visual effect, you’re lighting it so you can do whatever you want.” - Bradford Young, Cinematographer
The norms of how traditional creative systems are to be adapted are still being formulated, so being at the forefront of them as a creator is an exciting prospect.
CONCLUSION
I guess I’d sum up this piece by concluding that although the metaverse is still in its infancy, I think it’s indisputable that eventually filmmaking, and many other forms of entertainment, will continue to move into an increasingly virtual, online space.
As things become more and more virtual, filmmakers will need to adapt their skills from being more practical to being more conceptual. This process may be slow and take many many decades, but I have a feeling it may happen faster than we think.
The metaverse may open up interesting new possibilities for expression, but I think that the mainstream entertainment space will still be dominated by mass media companies that can spend the most. Bearing in mind that these are all predictions I think that there are a couple of things which most creatives should do to stay abreast of this changing visual world:
One. Stay informed and up to date on technological advancements.
Two. Continue honing and building your conceptual eye for visual communication and storytelling.
Because while the demand for your ability to physically photograph stories may dissolve over time, what has always been important, throughout the evolution of art from its earliest form up to what we have now, is the perspective of the artist. Having a strong artistic perspective and experienced eye for storytelling will ensure you’ll always have a job in whatever medium film, or visual storytelling, ends up being.
How Darren Aronofsky Shoots A Film At 3 Budget Levels
As I do in this series of videos, I’ll take a look at 3 different films made by Darren Aronofsky at 3 increasing budget levels: the low budget Pi, the medium budget The Wrestler, and the high budget Noah, to identify commonalities in his filmmaking and how his style has progressed throughout his career.

INTRODUCTION
The films that Darren Aronofsky makes occupy an interesting space. They straddle the line between experimental and realist, between mainstream and independent, between classical biblical allegories and contemporary tales.
However, what most of his films have in common is a strong emphasis on character and use of perspective to make the audience feel like you’re taking a journey in the shoes of those characters, not just observing their story from afar as an outsider.
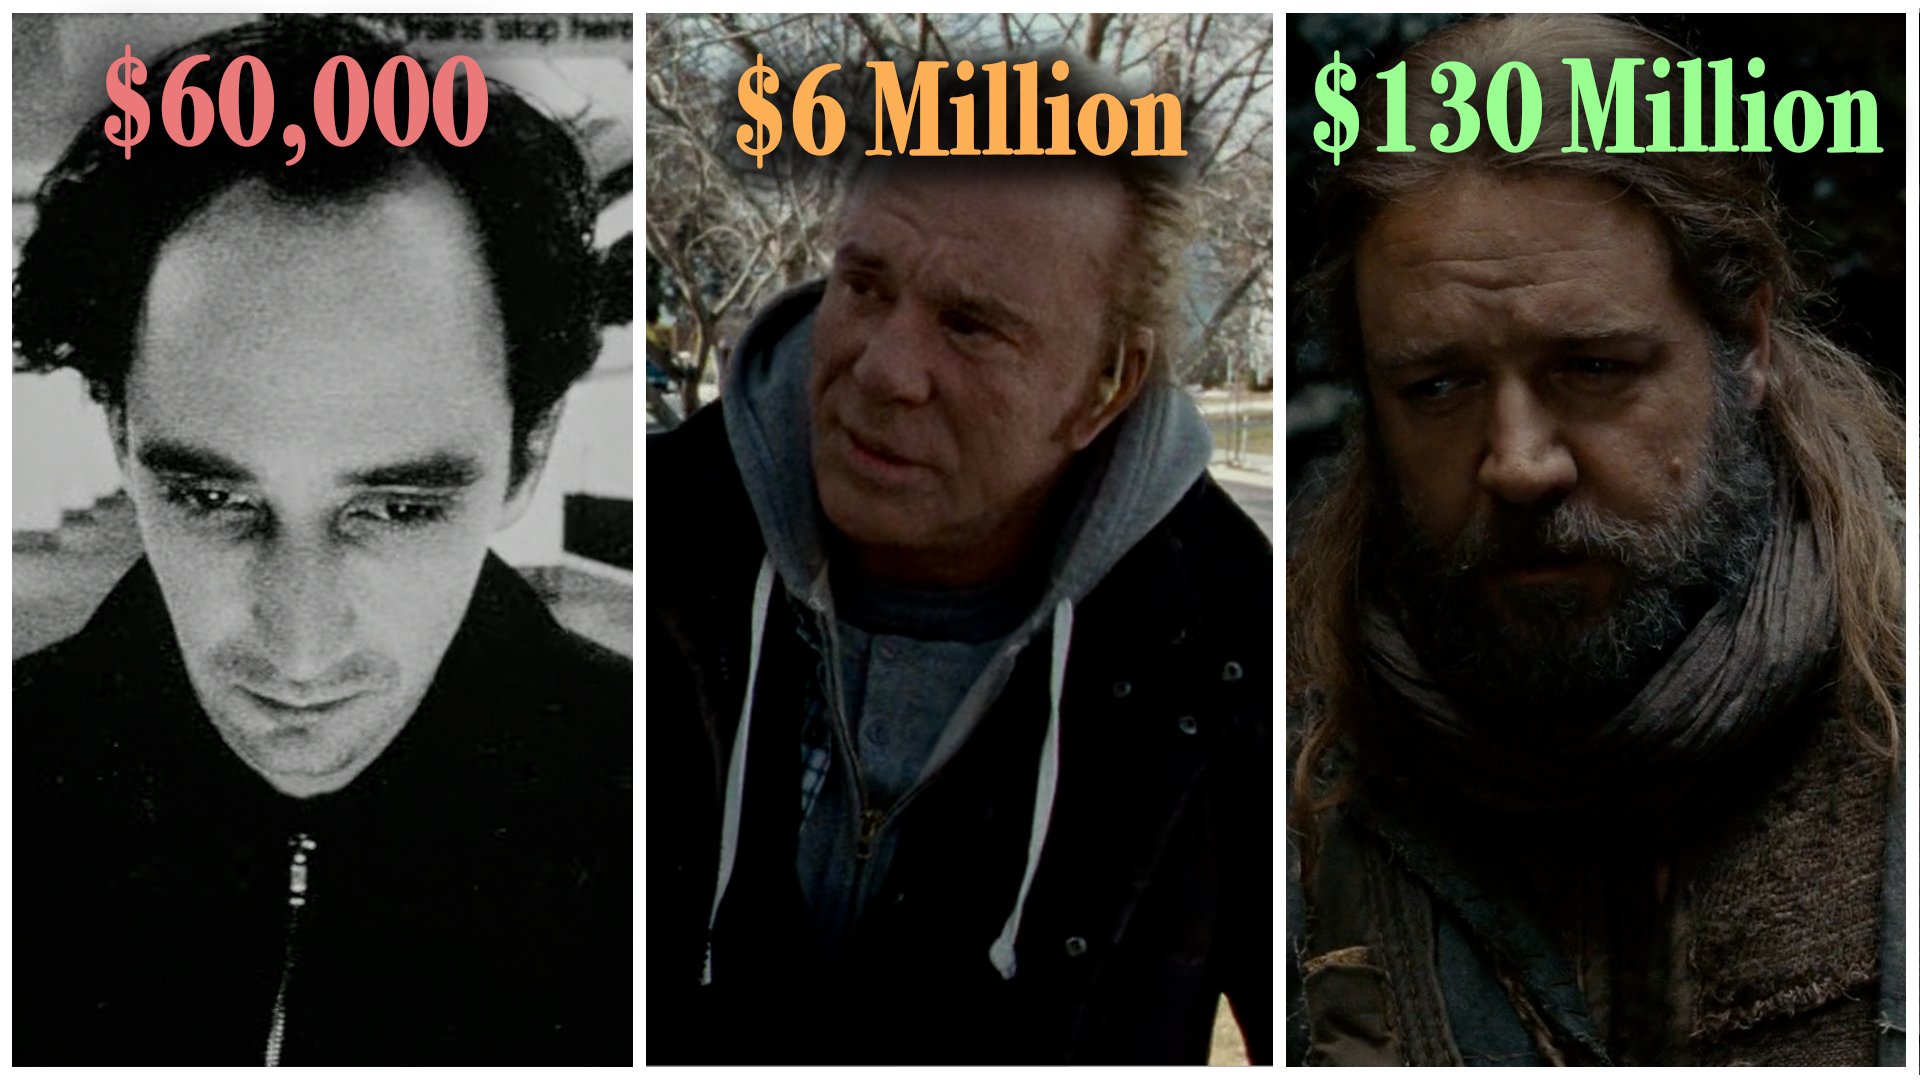
As I do in this series of videos, I’ll take a look at 3 different films made by Darren Aronofsky at 3 increasing budget levels: the low budget Pi, the medium budget The Wrestler, and the high budget Noah, to identify commonalities in his filmmaking and how his style has progressed throughout his career.
PI - $60,000
Aronofsky’s introduction to filmmaking came from him studying social anthropology and filmmaking in 1991 at Harvard. His thesis short film for the programme, Supermarket Sweep, starred his friend and actor Sean Gullette. It was well received and won him a spot as a finalist at the 1991 Student Academy Awards. He went on to get his masters in directing from the AFI Conservatory, where he met and began working with his classmate in the cinematography programme Matthew Libatique.
When it came to writing Pi, like with many other low budget films, he decided to focus on a single character. This idea of doing a portrait character study was born out of the verite documentaries he would make in film school which focused on the story of one person.
The experimental, psychological horror film was set in only a few locations, with the primary one being inside a small apartment.
The movie was financed through an early version of what I guess you could call crowdfunding. Aronofsky and his producer Eric Waston went around asking every friend, relative and acquaintance to give them $100 to fund their movie. Eventually they were able to raise $60,000 which, along with a host of other favours, was used to make the film.
Some of those favours included getting the crew to work for deferred pay by granting them shares in the film which would pay out once the film was sold, paying the actors $75 a day and getting a free warehouse which they could use to build their studio set.
Around $24,000 of the budget went towards the cost of buying and developing 16mm film stock and much of the remaining funds were reserved for post production. This left very little money for gear rental, production design or locations on the 28 day shoot.
However, Libatique who would photograph the film, was granted enough to rent a Aaton XTR 16mm camera, three lenses and a free, although small, tungsten lighting package to work with. He chose the XTR for it’s lightness, which helped with the ample handheld work, along with its ability to shoot single frames, which they used for the stop motion board game scene. He got 2 16mm Canon zooms, a 8-64mm and an 11.5-138mm, and one Angénieux 5.9mm wide prime lens.
To support a surrealistic look that Libatique termed ‘low-fi stylisation’ Aronofsky decided to shoot Pi in black and white.
“Darren wanted to shoot Pi in black-and-white for both aesthetic and budgetary reasons. He wanted the most contrasty black-and-white possible, with really white whites and really black blacks.” - Matthew Libatique, Cinematographer
To achieve this look Libatique decided on using reversal film, Eastman Tri-X 200 and Plus-X 50 for daylight scenes, which have high contrast but less dynamic range than negative film. The latitude, the difference between the lightest and darkest part of the image, was so small that he only had about 3 stops before the highlights started blowing.
Which is difficult to comprehend when comparing to modern digital cameras like the Alexa, which can handle more than 14 stops of dynamic range.
Libatique’s lighting and metering of exposure had to be extremely precise as being even half a stop too bright might mean losing all detail. On top of that he used a yellow filter to further increase the contrast and get rich blacks.
Their philosophy behind the look of the film was to create a subjective perspective that put the audience in the shoes of the protagonist. They did this by shooting with a single camera, shooting over the protagonist’s shoulder and moving it in a motivated way. So when the character moved, the camera followed.
To increase this personal perspective they also used a macro lens at times to capture close details in an abstract way that also represented the character’s gaze.
A final example of this subjective perspective can be found in the stylised use of mounting a camera directly onto the actor’s body. Kind of like vlogging, before the concept of vlogging existed. This gave a personal, up close, subjective perspective that mimicked the increasingly manic movement of the character.
They rigged a still photography tripod to a weight belt that was attached to the actor and mounted Aronofsky's own 16mm Bolex camera with a 10mm lens to the tripod. He altered the frame rates, overcranking his close up, and undercranking the camera at 12fps for his POV shots to show his increasing dissociation with the real world.
Aronofsky spent the majority of the low budget on sound in post production, where he was able to find additional funding, as he knew that without a strong sound design and mix the film would fall flat. He was able to get a score from Clint Mansell who, like the crew, worked for a deferred fee.
He was therefore able to pull off Pi on an incredibly low budget by: writing a story with limited locations, characters and no large set pieces, getting crew to work for deferred pay, pulling lots of favours, and using a small gear package to create a vividly experimental, subjective, surrealist look.
THE WRESTLER - $6 Million
After winning the Directing Award at Sundance Film Festival for Pi and selling it to distributor Artisan Entertainment for more than a million dollars, Aronofsky kick started his feature film career.
Following the bigger box office budget flop of The Fountain, Aronofsky picked a lower budget script for his following film, a realistic dramatic portrayal of an aging wrestler, written by Robert D. Siegel. He raised a budget of $6 million to make the movie.
After Nicolas Cage initially expressed interest in the role, it was eventually granted to Mickey Rourke.
Although Rourke admired Aronofsky’s work and wanted to make a film with him, he wasn’t overly happy about the script as he felt that some of the dialogue didn’t accurately portray how his character would realistically talk. Therefore he, along with Aronofsky, re-worked much of the dialogue in the script until they were happy.
Due to the free way that Rourke liked to work, apparently around 40% of the final film was improvised and initially unscripted.
“I tried to approach the film as free as possible. I didn’t go onto set as I usually do with very specific notes and shot lists. I tried to be open every morning to what Mickey was going to bring and then try and figure out after I saw that the best way of capturing it.” - Darren Aronofsky
For example, most of the wrestling scenes were scheduled during real wrestling matches. The crew would wait till about halfway through a match and then bring Rourke into the ring and shoot a bit, using the real energy from the crowd who turned up.
As it was very physically demanding Rourke would then leave the ring, re-gather his energy and come back to shoot a bit more. During these breaks the real wrestlers would keep the crowd entertained while Rourke recovered and the cameras were reloaded with new film stock.
To capture this free way of working, Aronofsky devised a style and approach which both supported how he wanted to tell the story and which was practical.
There’s not much realism in the world of wrestling, which is all about over the top performance, however the life of the main character in The Wrestler is too painfully real. So Aronofsky decided to create a film grounded in cinema verite, which followed his protagonist, literally, with an up close and intimate handheld camera. Again taking on a more subjective perspective, however this time one that was far more centered around realism.
To create this look he hired cinematographer Maryse Alberti who had a track record in both fiction and documentary work.
They shot it on Super 16mm, which suited both the modest budget, as it is cheaper to shoot than 35mm, but the grain from 16mm was also reminiscent of the verite, documentary look that they were going for.
To create the look for this realistic portrait, Alberti shot almost entirely with natural light, mainly using whatever practical lighting was already in the locations. She would sometimes bring in a couple of lights or tweak them slightly in order to achieve exposure but otherwise left the lighting alone whenever possible.
The only exception was the final match, which was a built set. In this she mimicked the lighting setups of many of the other matches which they had already shot - based around using overhead lights and lighting the four corners of the ring.
Since most of the movie was assembled from long shot sequences, photographed from the shoulder on a handheld camera, she chose the Arri 416 for her camera operator Peter Nolan.
She paired the camera with a set of Zeiss Ultra 16 prime lenses and two Angenieux Optimo zooms, a 15-40mm Lightweight and a 28-76mm.
Due to the length of the takes, Peter Nolan came up with some interesting techniques for operating the camera. One involved strapping an applebox to his waist so that when sat down with the camera during a take he could rest his elbows on the apple box and hold the camera steady.
Sometimes these long takes required plenty of choreography and involved grips holding up flags at various points to block out lights from casting shadows of the camera.
So Aronofsky in some ways maintained his perspective of shooting the film in a subjective way, yet moved away from experimentation and more into realism.
The Wrestler’s higher budget allowed Aronofsky to hire a cast of well known actors for this performance heavy drama and pay all the cast and crew fair rates, yet they saved money by shooting on 16mm, in a rough, verite, documentary style which allowed them to work on real locations, without any large production design, grip or electrical setups.
NOAH - $160 Million
The Wrestler proved to be both a critical and financial success.
A few years later he turned to producing a huge scope story which he had been interested in since he was a child: the biblical story of Noah. True to his style, Aronofsky adapted Noah to the screen by straying from the brief source material and including a more surrealistic, allegorical story, which visualised and presented themes through exaggerated characters and images.
Producing such a large scope script, with its epic set pieces, required a hefty estimated budget of around $160 million. Aronofsky turned to his regular DP Matthew Libatique to shoot the film.
“We were handheld on Noah, but it wasn’t like we were floating from character to character in a vérité style. I think we’ve matured as filmmakers and can focus on what’s important, which is subjectivity and storytelling.” - Matthew Libatique, Cinematographer
But, like on The Wrestler, Aronofsky wanted to be able to move the camera in a way that was very fluid and natural, but also in a way that was very controlled. Therefore Libatique mainly used Arricam LT cameras, which were light for handheld work yet also tough enough to handle working outdoors in the elements for extended periods without breaking.
With them he selected Zeiss Ultra Primes, mainly sticking to 3 focal lengths, a wide 24mm, a medium 50mm and a long 85mm.
This time he shot on 35mm, a format with greater clarity and less grain, more suitable for an epic. Libatique shot in the higher resolution 4-perf format for any shots that required post production special effects, and in 3-perf for regular scenes.
Although most of the film was shot handheld with a single camera from a more subjective perspective, certain scenes, such as the large flood scene, was shot with four cameras, two on Chapman Hydrascope cranes and two on the ground, to more quickly cover the many shots needed in this expensive set piece.
The magical exteriors were mainly filmed on location in Iceland.
When it came to lighting characters in those exteriors not much was done except for trying to block scenes so that the actors could be backlit by the sun. Libatique likes to keep things as naturalistic as possible so avoids lighting exteriors whenever he can, only using a muslin bounce occasionally when he needed more fill.
As Libatique says: “Fighting nature to mimic nature is a large undertaking.”
However some interiors and night scenes involved enormous setups. For example, to cover the battle scene at night his team hung 18 daylight balanced helium balloons from condors. Then, two 100-ton cranes each carried 100-foot rain bars, and another 100-ton crane carried an 80-foot rain bar, with two 32K balloons on each rain bar.
Another huge setup was the Arc set, which was constructed in three levels in a studio in New York. Lighting such a big space came at a cost.
For day scenes the rigging grip built a giant white ceiling bounce, made up of smaller UltraBounce surfaces. Bouncing into it were 20 20Ks, which they rigged on each side, underslung on the truss, and also 25 Mole-Richardson 12-lights.
Once production was wrapped, 14 months of post-production work began. During this time Aronofsky tasked Industrial Light & Magic with extensive VFX work including creating 99% of the animals in the film, dropping in background plates, like mountains or trees, and of course creating the mythical elements such as The Watchers.
As with all of Aronofsky’s films dating back to Pi, a score was composed by Clint Mansell.
Noah was therefore produced on a blockbuster budget, which was needed to create massive production design builds, enormous grip and lighting setups, a cast of stars and enormous set pieces which required over a year of innovative visual effects work.
CONCLUSION
Darren Aronofsky’s filmography covers an interesting range all the way from low budget independently financed films up to large studio blockbusters.
Despite this large growth in scale, his preferences for visualising themes and presenting them through characters using a subjective perspective has carried over throughout.
While the maturity of his filmmaking might have grown, it maintains elements of original experimentation and an eye for the surreal that he’s had since his earliest foray into cinema.
The 3 Basics Of Cinematography
I think the most important duties of a director of photography or DP can best be distilled into 3 basic elements: exposure, lighting and camera positioning and movement. Let's take a look at these 3 aspects of cinematography to show why they are crucial in order to fulfil the DPs overarching function of building and capturing the look of a film.

INTRODUCTION
As you can probably gather from the name of this channel, I usually make videos that skip over some of the basics and make content that is a bit more, well, in depth. But since I’ve had some requests in the comments to make a video that goes over the basics of cinematography I thought I’d do just that.
As the role that the cinematographer takes on is a fairly technical and complex one, it’s a bit tricky to distill all the nuanced things that they do into a single YouTube video. However, I think the most important duties of a director of photography or DP can best be distilled into 3 basic elements: exposure, lighting and camera positioning and movement.
These three elements align with the three departments on a film set which the DP manages: the camera, lighting and grip departments. To be a cinematographer you need to be able to control all three of these elements and manipulate them in order to capture a visual style which suits the story being told.
So let's focus on each one of these departments, or aspects of cinematography, to show why they are crucial in order to fulfill the DPs overarching function of building and capturing the look of a film.
CAMERA
Let’s start with a fairly necessary feature of cinematography, the camera.
To capture an image light passes through a glass lens and hits the film plane, which could house a digital sensor or a film stock. How the footage will look is determined by the amount of light that hits the focal plane and the sensitivity of how easily the digital sensor or the film stock absorbs that light.
This is what we call exposure. It refers to the amount of light that is exposed to the film plane. Letting in more light will result in a brighter exposure, while letting in less light will mean a darker exposure. One of the most important parts of a cinematographer's job is measuring and ensuring the correct exposure is achieved. Exposure is an important tool that DPs can easily use to create an image that reflects the correct tone and story.
A simple example can be found in comedies versus horror films. Typically comedies have a brightly exposed image which reflects the light, comedic tone of the story. While horror films often have a darker exposure which sets a broodier, scarier psychological tone.
To control exposure with the camera, the cinematographer can adjust three different variables: the shutter, the aperture and the ISO or film speed.
Motion picture cameras usually use a rotary disk shutter. This is a semi-circular disk that spins in front of the film gate. When the disk passes the film gate light will be blocked and not let in. As it turns there will be an open section where light will be able to hit the film plane.
Since the shutter takes up a percentage of a circle in film cameras it is measured in degrees which is referred to as the shutter angle. Adjusting the shutter angle affects the amount of time that film is exposed to light. So, making the angle smaller, like 45° means that the rotating shutter will block more light. Therefore the exposure will be darker. Inversely, making the shutter angle bigger, like 270°, means that more light will be let through and that the exposure will be lighter.
The shutter angle also controls the secondary function of motion blur. A smaller shutter angle will constrict motion blur and make footage feel choppier, while a larger shutter angle will increase motion blur.
Conventionally the shutter is therefore kept at 180°, which makes movement feel ‘normal’ to the human eye.
Cinematographers therefore primarily usually use the other two variables of aperture and film speed to control exposure.
Aperture is the hole in the lens that can be opened or closed to let in more or less light. On cinema lenses this value is measured as a T-stop and as an f-stop on still photography lenses. Opening the aperture, shooting with a smaller stop number, means that the hole is large and more light is let in. Closing down the aperture, shooting at a deep stop, makes the hole smaller and lets in less light.
Finally, the ISO or film speed refers to how sensitively the digital sensor or film stock responds to light. A low film speed such as 50 ISO is less sensitive so will be darker and a high film speed such as 800 ISO will be brighter.
So to expose an image which is not too bright and not too dark, cinematographers will manipulate this ‘exposure triangle’ of shutter angle, aperture and film speed until the footage has the correctly exposed look.
LIGHTING
Now that we know how to manipulate the brightness of an image by manipulating the amount of light that is let into the camera, cinematographers must focus on how the light that is let in actually looks.
Film lighting is usually done with continuous light sources. This is where the output of an electrical light remains fixed and consistent, unlike in stills where a flash, a brief burst of light, is often used.
There are two primary functions of lighting in film: first, creating a look for the film which is visually appealing and which suits the tone and supports the storytelling of the content which is being filmed, and second, maintaining a consistent source of light so that the exposure does not fluctuate unevenly during shooting.
A mistake I made when I got my hands on a camera and first started shooting short films was not focusing enough on lighting. Beginner cinematographers, myself included, often think creating a beautiful image comes from having a nice camera to shoot on. That it’s all about having the newest, fanciest gear.
However the most important part of cinematography and creating an aesthetically appealing image is rather to focus on how the image is lit.
There are no hard and fast rules when it comes to lighting, but familiarising yourself with some basic lighting ideas and even just being aware how the light hits a subject and affects the way a shot will look, is the most important first step.
The second reason that lighting is important is that if you are shooting only using natural light, it has a tendency to change throughout the day.
For example the sun may begin by shining through a window and then move overhead, throwing the interior into shadow. But, having a strong light source placed outside a window that replicates the sun's light will minimise any changes that might prevent different shots in a scene from matching up.
Maintaining consistent lighting and cinematic continuity between different shots photographed at different times is an important part of being a DP.
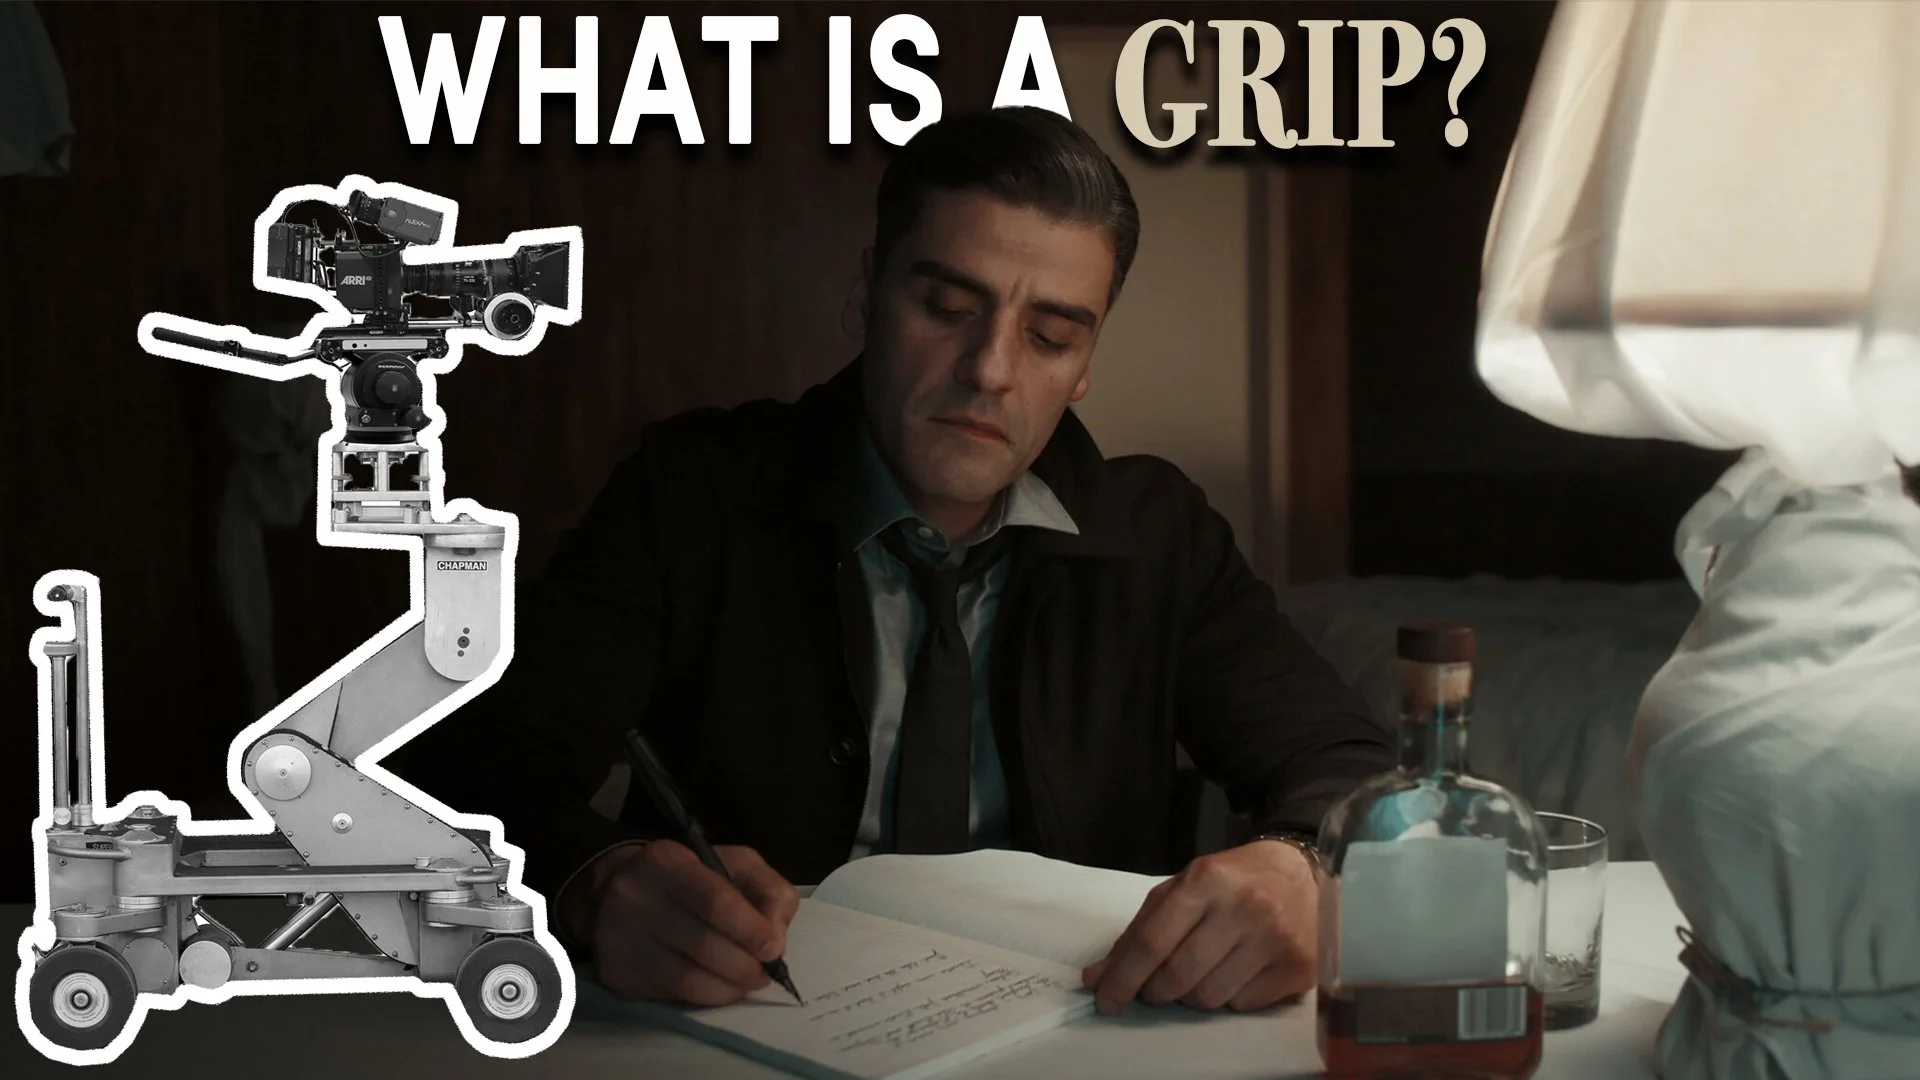
GRIPS
Now that the exposure is under control and we have lit a scene in a consistent way that supports the visual style of the story that is being told, the third most important basic element of cinematography is the placement of the camera and how it moves.
Some directors may leave a lot of this to the DP. Others may like to dictate exactly how the camera moves or a shot is framed. Regardless of the creative input, it is the job of the cinematographer to technically execute those choices.
When it comes to camera placement there are some basic guidelines which should be followed, such as the 180-degree rule.
This states that the camera should be kept on one side of an imaginary axis when shooting a scene that cuts between two characters. So that the first character is always frame right of the second character. However, on occasion, filmmakers have intentionally broken this rule for effect.
How each shot in a movie is framed and executed should be a conscious choice by the cinematographer and director, as different movements will have different effects on an audience. Just as different songs can make you feel different emotions, so too can camera movement. But perhaps in a more subtle way.
For example, a manically operated handheld camera has a different feeling to a buttery smooth tracking shot.
Therefore, when it comes to placing and moving the camera, cinematographers need to be knowledgeable about both the psychological effect that camera movement and framing has on an audience, and an understanding of various grip rigs and gear that can be used to create those moves.
CONCLUSION
So there you have it: exposure, lighting and camera placement and movement. Three basics that every DP consciously controls.
As I mentioned at the beginning, these three things only touch on the fundamentals of cinematography. There are a whole host of other decisions that DPs have to make on a minute by minute basis on set.
But, when you’re starting out, be sure to remember these three basic elements and focus on using them to bend the visual tone of the cinematography into a shape that best suits the story.

What A Key Grip Does On Set: Crew Breakdown
In this Crew Breakdown episode I’ll go over the head of department position in the grips department, key grip, a job which not everyone is familiar with but which greatly contributes to the look of many movies.
INTRODUCTION
In this series I go behind the scenes and look at some of the different crew positions on movie sets - the people who go about physically constructing each and every shot that happens on screen.
In this Crew Breakdown episode I’ll go over the head of department position in the grips department, key grip, a job which not everyone is familiar with but which greatly contributes to the look of many movies. I’ll break down what they do, their average day on set and some tips which they use to be the best in their field.
ROLE
The key grip heads the department and is responsible for planning, supervising and delegating instructions to other grips in their crew.
But what exactly do grips do?
Well, whenever you see an impressive shot in a film where the camera moves in an innovative, amazing way, a grip is behind it. So grips are in charge of planning and orchestrating camera movement and the positioning of the camera which is described or delegated by the director and cinematographer.
To do this they rely on constructing and operating a variety of rigs that the camera is attached to. Some examples of these include a dolly, a crane, a ladder pod, a Technocrane, a tripod or hard mounting the camera onto objects like a car, a motorbike or even a shopping cart.
The second duty that a key grip does is rigging.
Their capacity in this regard changes depending on the working style of the country. For example in the US grips are expected to place and secure lighting stands, whereas in other countries, like South Africa where I work, the lighting department handles this.
However in almost all locations grips are expected to help out with the more complex rigging of lighting equipment. For example, securing a polecat or pole between two walls so that lights can be placed high in the ceiling. Or, rigging large scrims or blackouts, such as 20x20 foot sized frames, above actors using heavy duty stands, trusses or attaching them to a Manitou.
The third and final broad category of their work is determining the safety of a setup.
For complicated shots, difficult rigging or placing crew or cast on film equipment, the key grip is consulted on determining the safety of the setups and those involved. Having an experienced grip on the crew is important in this regard to ensure that, most importantly, there are no injuries, or damage to property, sets or gear.
This is why rental companies insist upon an experienced grip to be present when heavy duty equipment, such as Technocranes, are rented or used on set.
Overall the role of the key grip is a broad one, that carefully plans, consults with creative crew members like the director and DP, and then practically executes their vision with a variety of rigs in a safe and responsible manner.
AVERAGE DAY ON SET
The key grip joins a project before the on set shoot begins.
In pre-production they will discuss the shots that need to be gotten with the DP. Sometimes this will be done with the help of storyboards or even a pre-vis animation if the filmmakers are very specific about the kind of moves they need to do.
Some shoots are relatively straightforward and may only require basic handheld shots, while others may require complicated, tricky camera movement, custom grip rig builds or large amounts of lighting rigging that may require more planning.
Before shooting they will also go on a reccee to the shooting locations with the director, cinematographer and other relevant crew members. Here they will physically plan out, measure and assess the grip logistics - such as whether a dolly can fit through a door, or what length of pipe they will need to rig to the ceiling.
The key grip will therefore arrive on set usually with a solid idea of what lies ahead for the day. They will get a shooting schedule from the 1st AD and start preparing for the first shot. This could be a dolly shot.
In this case the DP will use a viewfinder, the camera, or their eye to determine a position and start and end point for the move. The key grip will mark these points and call on his team to bring in the correct lengths of track.
They will place the track, level it then bring in the dolly and lift it onto the track.
It should be noted that depending on the country or size of the shoot there may be a dedicated dolly grip who pushes the camera on the dolly. In some countries, such as mine however, this is usually also done by the key grip.
The grip department is made up of a key grip, who consults directly with the DP and leads the department, making important decisions. Next, the best boy grip, who manages things like gear inventory and oversees a team of grips which will fluctuate depending on the size and needs of the shoot.
The key grip and their team will continue setting up ways to position and move the camera throughout the day, while also assisting the lighting team with any necessary rigging work.
Some other duties they are called on to perform may include operating a gimbal and ensuring the safety of the operator when doing handheld work. This is done by gripping, excuse the pun, a part of the operator’s body, such as their waist, and moving with them as they operate, making sure they don’t trip, loose their balance or crash into any obstacles.
TIPS
Although I’ve never worked as a grip myself, I have observed a few tricks that some of the best use on set.
Since many grip setups, such as laying and leveling tracks or building a crane are very time consuming, the best grips are always a few steps ahead and get their team to use whatever gear is available to start on the next setup before it happens while the key grip stays with the DP close to the camera.
For example, when shooting in a house they may start off with locked off dolly shots then move onto a tracking shot outside the house. A good grip will consult with the DP beforehand to get a position for the tracking shot and then get his team to lay and level tracks so that they are all set up when they move onto the next shot.
Finding ways to save time will ingratiate yourself with the DP and director as it gives them more time to shoot.
Another way of saving time is to always try and get camera moves as correct as possible every time. To do this it’s useful to use tape and make start and end marks next to the dolly wheels. That way the dolly grip knows exactly where to start and stop each move and will never waste time by over or under shooting it.
Also having a tape measure or, ideally, a laser measurer will allow you to quickly determine measurements, such as what pole length to use, or how many track lengths are required.
A last tip is to always have the right tools for the job. This is why key grips often have their own grip truck which is fully kitted out - a process that happens through years of acquiring tools that are necessary on set.
This usually includes a full set of apple boxes, packing and wedges. These useful pieces of wood are always required on set for everything from leveling a track, to propping up a product or, most importantly as a seat for the director.
Grips should be prepared for everything: from having a jigsaw to cut bits of wooden board, clamps, WD-40 to lubricate moving parts, rolls of gaffer tape for making marks, and a selection of wrenches, allen keys and other tools which may be needed to adjust mechanical parts.
Actually scratch all that…I’ve just remembered the real best tip that any grip can follow. Get padded seats for your apple boxes. Have padded apple boxes and the crew will worship you!

Cinematography Style: Chung-hoon Chung
In this episode I’ll look at Chung-hoon Chung’s philosophy on photography and show some of the gear which he uses to execute his vision.

INTRODUCTION
Chung Chung-hoon is a cinematographer whose work doesn’t abide by one particular aesthetic. His photography is flexible and balanced differently for each project.
With that said, much of his work, especially with director Park Chan-wook, has taken place in the thriller or horror genres. Therefore, he does tend to treat these stories with a slightly darker eye and cinematic tone which is slightly surrealistic and elevated from reality.
In this episode I’ll look at Chung Chung-hoon’s philosophy on photography and show some of the gear which he uses to execute his vision.
BACKGROUND
Chung’s entry into the world of cinema didn’t start behind the camera. It started at the age of 5 when he was cast as the lead in a show which became a huge hit in his home country of South Korea. This acting career went on to last 15 years until he began studying at Dongguk University in Seoul where he directed several short films. He also served as his own cinematographer on these projects.
Chung began his official career as a feature film director of photography at 25, which he has continued doing ever since.
His biggest breakthrough came after Park Chan-wook’s editor put his name forward to shoot his next film Oldboy. He was a fan of his prior film Sympathy For Mr. Vengeance. At first he hung up when Park’s production team called him as he thought it was a prank. An hour later he got a call from Park himself. He won the job without Park ever having seen any of his prior work.
Oldboy accelerated his notoriety as a DP in Korea and internationally and began a long working relationship with Park. Some other directors that he’s worked with include his recent collaboration with Edgar Wright, Andy Muschietti and Alfonso Gomez-Rejon.
PHILOSOPHY
“From my viewpoint as a cinematographer, the creation is not about obsessing on making new things that no one has created before but to combine things that fit the film with the right balance.”
Getting this ‘right balance’ is one of the reasons why he does not maintain the same stylistic flairs across projects. To him, the right balance is attained by having a deep appreciation and understanding of the story. He credits his early work as an actor as giving him a solid grasp on storytelling.
“The reason I keep mentioning the drama of a piece is because only by understanding the characters and what they go through can I provide and capture all the movement I want and need to capture.”
“For example, in Oldboy I saw the overall movement as the chasing of the characters and as such there is a lot of long lens and zoom lens work, shots taken from behind and less handheld camerawork, more fluid I guess I would say. I believe if I understand the characters I can accurately build up relevant, sympathetic scenes within whatever overall genre is required.”
After gaining sufficient understanding of the story and characters, when working with Park, they’ll then set out to storyboard the film. Although he says that probably about 40% of the storyboarded shots change, he likes having them as a base to start from.
Since they’ve worked together on so many projects, Park is readily accepting of lots of his ideas. Chung credits Park as being a good director for his ability to discern and accept, or reject, ideas which he puts forward. This is what gives the films their overall style and tone.
When it comes to translating these ideas to the screen, he prefers to shoot with a single camera whenever possible, as it is quicker to light and means he never has to sacrifice any angles or lights that may have to be moved due to the placement of a second camera.
With that said he has used multiple cameras, on films such as It, for the purposes of capturing performances more easily or to speed up production.
GEAR
Although many aspects of his cinematography like the way the camera moves, the colour palette, grade and focal length selection, changes depending on the story and whims of the director there still are some elements of his style which are present throughout his filmography.
For example, many of his movies are photographed in a 2.35 aspect ratio.
In many films he uses a hard backlight with a soft fill. In It this was done by using tungsten Vari-Lite VL1000s rigged to the ceiling to provide backlight from any angle and then filling in the space by rigging 17 Kino Flo Image 85s with daylight tubes to a pipe above the set. The Kino Flos were fitted with egg crates so that the light from above didn’t spill too much onto the walls, which maintained deeper shadows and more contrast.
He’s used this similar technique with different lights in different positions in his other films, dating back to his early work. Backlight characters with harder lights and filling in with something soft and diffused to retain detail in the shadows.
In some films his lighting is more naturalistic and in others it’s a bit more exaggerated depending on what’s best for the story. Although Chung has mentioned that keeping things looking fairly natural and real is a good way of making horror films look and feel scarier.
For interiors he often employs a subtle use of colour, particularly a mix of off-green and tungsten light, which he has done in many films to bring in a slightly sickly feeling of dis-ease.
He may use atmospheric smoke to give shape to the light.
When it comes to choosing a camera his previous work was captured on 35mm film but after the digital revolution he has mainly stuck to shooting with digital cinema cameras. He almost exclusively uses Arri cameras: like the 435 or Arricam ST for film and the Alexa XT or the Mini for digital.
He pairs these with a mix of spherical and anamorphic lenses. When using film he preferred sharper lenses such as Zeiss Ultra Primes or Zeiss Master Primes, but now that he shoots digitally he prefers lenses which are a little bit softer or that have vintage characteristics such as Hawk V-Lite Vintage 74’s or Panavision G-Series anamorphics. Chung carries Angenieux Optimo zooms on most films, usually the 24-290mm.
When working with the Alexa now, he uses a colour accurate monitor and a remote iris control on the camera so that he can ride the exposure to levels that he is happy with by wirelessly changing the iris.
Chung works with a Rec 709 LUT which may be tweaked live on set by his DIT based on his feedback. His main focus is on getting the contrast right on set and has said that he usually leaves the overall colour in the grade down to the director and their preferences.
For example, a lot of his work with Park is quite punchy and saturated with strong contrast and deep shadows, while on Me and Earl and the Dying Girl the grade is more washed out and desaturated.
He isn’t the biggest fan of the steadicam and often prefers to use a dolly and tracks for camera moves with greater stability and control.
CONCLUSION
From comedies to thrillers to horror films, Chung Chung-hoon is familiar with multiple genres. His greatest ability is being able to read the correct cinematic tone for the story and characters and adapt his technical choices to get the right balance.
Sometimes the right balance is manic and stylised. Sometimes the right balance is natural and real. Sometimes it’s dark and moody.
Chung is able to separate himself from any one aesthetic and craft a cinematic language which is always right for the story.

The Most Popular Cinema Cameras (Part 3)
In the third part of this video I’ll go over a few more of the most popular cinema cameras which have been used in the film and commercials industry. I’ll look at a variety of formats and go over their ergonomics as well as the look which each can create.

INTRODUCTION
The camera is an important tool in the cinematographer’s toolbox. Different cameras offer different mediums and influence the look and capabilities of how footage is shot.
In the third part of this video I’ll go over a few more of the most popular cinema cameras which have been used in the film and commercials industry. I’ll look at a variety of formats and go over their ergonomics as well as the look which each can create.
IMAX MSM 9802
Let’s start with a niche but pretty incredible format - Imax - in particular the Imax MSM 9802. Almost all other film cameras for other mediums such as 16mm or 35mm use a vertical pulldown, where the film goes through the magazine, passes through the gate from top to bottom and re-enters the exposed side of the magazine.
Imax is different.
To get the greatest possible exposure area of the negative, Imax cameras use 65mm film which leaves the magazine, passes through the film gate horizontally and then re-renters the magazine. 35mm usually exposes an area which is 3 or 4 perforations long. Imax exposes 15 horizontal perforations for each frame of footage.
This technique produces a negative that is nine times larger than the 35mm format, and three times larger than regular 70 mm film - making it the largest, highest resolution film camera available.
The camera uses 65mm film stock which is then printed to 70mm for screening, with the extra 5mm used for the camera’s audio tracks. It can also be scanned and converted to digital files usually at high resolutions like 4K, 6K or 8K.
It has incredible fidelity, contrast and no trace of grain with an estimated horizontal resolution of around 12K.
But this monster of a format does come with a few limitations, one of the biggest of which is price. A single 1000’ roll, which lasts for a measly 200 seconds of shooting time, costs almost $1,300.
Renting a MSM 9802 will be about $16,000 a week. Factor in development costs and you’re probably looking at the most expensive motion picture format in the world to shoot. Roughly four times the cost of 35mm.
It’s outrageous price tag, as well as it’s large, ungainly ergonomic design which is needed to house the 65mm stock that passes through the camera, means that it is usually used for specific set pieces in films and is always shot very sparingly and deliberately.
This isn’t exactly what you’d call a run and gun camera.
The cameras come with their own rulebook and standard protocol dictates that a specific Imax trained DOP is hired to shoot with the camera. However, on The Dark Knight, Christopher Nolan and Wally Pfister tore up the rulebook and decided to shoot it without the aid of a dedicated Imax DP.
They broke Imax protocol which stipulates maintaining an enormous amount of headroom, to avoid the audience craning their necks in order to see the top of the image in most Imax theaters. Instead of putting the central crosshair on top of the head, they placed them on the eyes for close ups.
Due to the enormous resolution of the negative, small errors like make up flaws or camera tape on the floor can be picked up far more easily.
Imax cameras need to be used with large format lenses that will cover the 65mm negative without vignetting. For example, Hasselblad medium format stills lenses are a common choice. The huge Imax negative, combined with the longer focal lengths which need to be used, creates an extremely shallow depth of field, making the focus puller’s job very challenging.
The MSM is the lightest Imax camera and is therefore preferred for rigs that require a smaller camera build, such as stabilised heads or even a ridiculously heavy steadicam build.
Although these bulky, hefty cameras were designed to be shot in studio mode from a dolly, tripod or stabilised head, convention has occasionally been broken and cinematographers like Hoyte Van Hoytema have even shot with them handheld.
Imax is therefore mainly used by productions with a large budget, who are aware of its ergonomic difficulties, challenging focus and short roll time but which require a 65mm film image with the highest possible fidelity available on the market.
ARRI AMIRA
In past episodes I’ve looked at the Alexa Mini and the Mini LF. Well, the Amira is another camera in Arri’s lineup but for a slightly different market. Although it has the same Super 35 ALEV III CMOS sensor as the Mini it is used less frequently in feature films.
Ergonomically, what makes it different is that the Amira is set up for single operator use, meaning it is ready to shoot without having to be built or configured much. It has great ergonomics for handheld work right out of the box, making it perfect for productions where the operator shoots from the shoulder, such as documentaries, TV shows, or independent films that work with smaller crews and require an easy to operate setup.
Its dust-proof, splash-proof, sealed-off electronics make it a hardy camera and a good pick for the challenging environments of documentary shoots, while its sensor still is able to produce the classic Arri digital look. This makes it possible to easily cut Amira footage alongside shots taken with other Arri cameras.
For example, on Nomadland cinematographer Joshua James Richards paired the Amira with floating gimbal footage shot on the smaller Alexa Mini, which cuts together seamlessly.
It’s ergonomics reflect that it’s designed for use by solo operators. It has three internal FSND filters. The switch for them is well placed just under the lens mount, making it easy for operators who are pulling their own focus or changing their iris to quickly adjust filters on the fly.
It also comes with three XLR inputs so that operators can record sync sound straight into the camera to cut down on post production synchronising work and be able to mix their own sound quickly and easily on the camera - which is often a necessity for documentaries.
The rest of its accessories such as the top handle and viewfinder menu are solid, easy to use and pretty standardised across the Arri range. The Amira can shoot up to 4K UHD in ProRes or in ARRIRAW at 2.8K with a license. It also has the interesting option to use less photosites and shoot in a Super 16 mode with 16mm lenses.
Overall, the Amira’s larger form factor meant that the Mini became Arri’s most popular cinema camera due its greater modularity and ability to more easily be configured into multiple lightweight rigs and forms such as a gimbal or rigs in tight spaces.
However, its larger size and operator focused ergonomics make it perfect for solo shooters who require the Alexa look.
ARRICAM
The Arricam, introduced in 2000, is Arri's most modern, flagship 35mm sync-sound camera line, which replaced the large Arriflex 535.
There are two variations: the Arricam Lite or LT and the Arricam Studio or ST.
The Arricam is a competitor of Panavision’s Millennium XL line. The two share the spot of the most used modern 35mm camera today. Like the Millennium it can shoot 3 or 4 perf 35mm film and comes with an array of updated conveniences, such as: a clear, modern viewfinder, LDS, a low operating noise of 20 decibels or less for 4 perf and an updated video tap system.
The Arricam Integrated Video System outputs a 1080p video feed that is colour accurate and removes the grain and texture from the ground glass. This means focus pullers, cinematographers, directors or any other crew member or client can watch a fairly accurate video approximation of what the final 35mm shot will look like once developed.
On large enough productions an Arricam ST and LT may be carried for different applications. But, if there is only the option to rent a single camera the LT is often the go-to. This is due to it being a more modular camera that can be configured into a greater variety of builds.
A LT Magazine Adapter can be used to mount a 1000’ studio magazine onto the Arricam LT for the ability to roll for longer than the 400’ film magazines it comes with.
The ST usually comes with a 1000’ mag, and, as its name suggests, is better for studio builds where the camera is on a rig where weight and size don’t matter like a tripod or dolly.
An advantage of the ST is its ability to shoot at higher frame rates up to 60FPS, while the LT tops out at 40FPS.
The Arricam is therefore a great modern 35mm camera that comes with all the necessary bells and whistles for modern shoots using film.
CANON 1014 XL-S
Finally, for something different let’s look at a camera that shoots in a format which isn’t as popular, but which still gets plenty of use to this day - Super 8.
When it comes to modern Super 8 cameras, the Canon 1014 XL-S is top draw. Although 8mm isn’t the most common format it is used for it’s lower fidelity look, or in combination with other formats on mixed medium shoots for artistic or creative effect.
It’s tiny negative size, very high grain levels and lack of resolution and sharpness mean that it is rarely used as the sole medium on a project. Although it has been used on some music videos, commercials and no budget films from the past.
Due to its historic use as a low-cost medium to capture so-called ‘home video footage’ by regular people and families, it has associations with nostalgia.
The Canon 1014 is easy to operate but also comes with about all the additional extras possible for people who are more serious about shooting Super 8. It can shoot both sync sound or silent 8mm film, which is easily loaded into the camera by inserting a cartridge without the need to load it in the dark.
The camera comes with a hot shoe mount on top which can hold a microphone and record sound through a 3.5mm mini jack.
The camera comes with a 6.5-65mm f/1.4 zoom lens which has a 72mm front thread for screw in filters. Although I’ve also stuck standard 4x5.6” filters straight onto the lens before with gaffer tape.
Its ease of use and many capabilities such as its ability to shoot at various frame rates, including a slow mo setting of around 36FPS, manual aperture control and automatic ISO setting by the 8mm cartridges, make it one of the most popular Super 8 cameras used for professional usage today.

Why Does It Always Rain In David Fincher's Films?
After watching a few Fincher films I realised that one way he presents a cinematic world which is an exaggerated version of real life is through the weather.

INTRODUCTION
Cinema is an enhanced version of reality.
Even the most naturalistic ‘based on a true story’ movie bends the real world for the sake of more engaging cinema. For example, every film uses lighting to amplify reality for emotional effect. Without it stories would lack a visual appeal and appear bland.
Every movie carefully selects a costume for its characters and uses a deliberately designed set to present information in the frame. If the strict and complete truth was always presented on screen it would diminish the emotional and thematic statements which the filmmaker is trying to make.
After watching a few Fincher films I realised that one way he presents a cinematic world which is an exaggerated version of real life is through the weather.
SEVEN
In Seven it’s always raining. From scene to scene to scene. In fact, just about the only scene where it isn’t pouring with rain, the sun is baking down a sweltering warm light with harsh shadows. So why is the weather often so unrelenting in Fincher’s Seven. Well, I think he uses weather in the same way that cinematographers use light or that costume designers use fabric. It’s a textural, tonal tool that unconsciously amplifies emotion and lifts the story out of mundaneness.
The challenge for any artist has always been how to take a form, in this case a series of projected 2D images, and make the viewer experience a real, life-like, emotional reaction akin to how they feel in the real world.
A word that Fincher himself has used in interviews is ‘visceral’ - defined as relating to deep inward feelings rather than to the intellect. Rain produces deep inward feelings - damp, dirty, cold, wet, chilled to the bone. None of these associations are particularly pleasant. Trudging through rain without an umbrella feels harsh. This is why it’s perfect for the grisly, harsh story of tracking down a serial killer.
Weather reflects the emotional tone of the story.
Take this scene. Reading the screenplay, that Fincher was tasked with turning into a movie, reveals nothing about it pouring with rain.
The description for this scene reads: “The trunk of Somerset’s car contains a homicide kit...Somerset takes out rubber gloves and pockets them, closing the trunk. He walks to join Mills and Officer Davis, a uniformed cop.”
It’s a very factual description which only talks about actions, not tone, nor the weather. Fincher could have set it on a regular sunny day with the sounds of birds chirping in the background. It would have saved on the expense of hiring a bunch of rain machines and the set up time it took.
Instead he opens the sequence with the unscripted shot of Mills standing cold, drenched, hunched, shifting uncomfortably holding two takeaway coffees. The rain beats down. The presence of rain adds a very different psychological feeling than it would if Mills was standing around, hands in his pockets on a blissful summer day. It puts the characters, and us as the audience on edge, setting the tone for the grisly, harsh scene which is about to come.
When asked about the film, Fincher noted that Seven was never meant to be a movie which used violence for the sake of violence. Rather it was meant to capture a psychologically violent tone that gets the audience to imagine inhumanity.
Creating a tense, visceral tone, with things like weather, that hangs around like a mist the entire movie is arguably more effective at creating a feeling of inhumanity than simply showing something gruesome happen. The build up is more terrifying than the pay off.
THE GIRL WITH THE DRAGON TATTOO
With all this analysis and psychological guesswork out the way let’s turn to a quote from Fincher about the rain in Seven: “The movie cost $15 million below the line. We wanted to shoot in Oakland. Beautiful clapboard houses. But we didn’t have enough time. So it’s all downtown LA. The reason it rains all of the time is that we only had Brad Pitt for 55 days, with no contingency. So we did it to stay on schedule, because we knew that if it ever really rained we would have been f-----.”
So I guess that theory goes out the window. Maybe the only role that weather serves is a practical one to maintain continuity when time is limited. But maybe not. I still think his choice of using the rain is one that has a tonal impact on the story.
Seven isn’t the only movie of his which features extreme weather conditions. In Girl With The Dragon Tattoo, from the lighting down to the colour grade, it always feels cold. This bone chilling cold seeps into the story, which also deals with inhumanity and violence, in a visceral way. Indeed many scenes take place with snow.
While you may think that maybe this time Fincher brought in a bunch of snow machines to avoid any weather problems again, the opposite in fact was the case.
“Well, it informed [the story]. You needed to feel it. You know, a lot of the snow and a lot of the weather effects are CG, and I didn’t know if I’d have dared to make it as bold and crazy. I would have thought it was over the top had I not lived through it.”
In many scenes, CGI is used to amplify the weather and feeling of cold in the story. Creating that thing that Fincher is so good at doing - an overall, visceral tone.
Due to the difficulty of accurately predicting weather conditions and getting inconsistent weather, CGI is a way of reliably attaining control over how much of the elements filmmakers would like to add to sets.
Like many of Fincher’s characters, who are drawn to details, he himself is a filmmaker to whom details matter. Using visual effects to do it in post production affords him maximum control.
Although imbibing the film with cold throughout certainly puts you in the dark place of minds of the characters, I think that not all weather symbolises the same emotions. Just as colour usually has symbolic meaning which is not necessarily tied down, so does weather. It’s raining in both of these scenes but the emotional tone differs pretty significantly between them.
THE SOCIAL NETWORK
Even in an arguably less visceral more conventional drama like The Social Network weather is used in subtle ways at key moments in the story to alter emotion.
For example, after the protagonist gets dumped by his girlfriend, he steps outside the pub and takes a walk around. During his walk around the campus, the floor is damp. It has just rained. This subtle touch adds to the dampness of his mood. This was done using a technique called a ‘wet down’, where hoses are used to spray a textured floor, such as tar or paving, prior to shooting.
This both creates highlights on the ground from backlight, breaking up darker parts of the image, and, importantly, adds an atmospheric touch.
Or, when one of the characters finds out that his idea has been stolen he goes outside into the cold night and crosses a bridge littered with patches of snow. This little detail is a decision clearly made by the director to create a cold, desolate feeling.
Or in the build up to a big argument scene in the movie one of the characters arrives and, you guessed it, it’s raining again.
Now I’m not arguing that all weather in films that you see is always intentional. There are definitely situations where you have to just shoot in whatever weather you have. But I would argue that Fincher, and many other filmmakers out there, are as deliberate as possible about how they use weather. They try to control it as much as they can.
Fincher said in an interview that filmmakers usually only get about 60% of what they want to film on set - and that’s on a good day.
He makes up for this gap with special effects using rain machines, fake snow or CGI weather to control the tone of the story.
So the next time that you’re writing a screenplay, directing or even watching a film, take a second to think about what the weather is doing and how it is used to enhance reality and sculpt a very specific filmic tone and visceral feeling.

What A Focus Puller Does On Set: Crew Breakdown
Since, the camera department is what I’m most familiar with, having worked as a camera assistant in the film industry myself, I’ll break down the role of the 1st AC or Focus Puller, to uncover what they do, their average day on set and some tips which they use to elevate their game.
INTRODUCTION
In this series I go behind the scenes and look at some of the different crew positions on movie sets and what each of these jobs entails.
Since, the camera department is what I’m most familiar with, having worked as a camera assistant in the film industry myself for years, I’ll break down the role of the 1st AC or Focus Puller, to uncover what they do, their average day on set and some tips which they use to elevate their game.
ROLE
A Focus Puller or a 1st Assistant Camera are responsible for maintaining the camera lens’ optical focus by manipulating the focus gear on the barrel of the lens. Cinema lenses come with distance markings, which are usually displayed in feet and inches, but sometimes also in metric units depending on the country.
Pulling focus is the act of using these distance measurements to manipulate the focus distance on a lens so that they align with the distance between the subject and the camera's focal plane or sensor. For example, if an actor is 6 feet away from the focal plane and the 1st AC sets the lens to 6 feet then the actor will be sharp and in focus.
Focus can also be determined by referring to sharpness on a monitor using the eye.
Usually the focus will shift during a shot, for example when an actor moves closer towards the camera or if the camera moves closer towards its subject. It is the job of the 1st to time the focus pull so that the distance of the focus is always correct throughout the movement.
In most cases cinematographers will hand pick their 1st AC, based on their track record, prior relationship, or a recommendation from a trusted source. The technical act of capturing the image lies largely in their hands, so DPs are careful about their selection.
Contrary to what the name may suggest, pulling focus is far from being the only job that the focus puller performs. Some other responsibilities include: building the camera and configuring it depending on how it will be rigged, troubleshooting any technical camera glitches, setting the exposure which is dictated by the cinematographer, changing lenses, providing technical advice about camera gear to the DP and being responsible for the overall running of the camera.
Although focus pulling is largely a technical pursuit, it does require an artistic eye or emotional sensitivity to the story. They choose, literally, where to direct the focus of the audience’s eye, anchoring their attention to a particular part of the frame. Often the focus is on the actor, but not always.
Who should be focused on in a two shot featuring two cast members? Should the focus change, or rack, between them? Do we stay on one of them the whole time? When should the focus shift? These are all decisions usually made instinctively by the 1st, sometimes with feedback or suggestions from the DP between takes.
The first thing that many non-film people ask when the role of the focus puller is explained is: Why not just use autofocus? My smartphone can do it. Why can’t a tremendously expensive cinema camera do it?
There are several reasons.
First, autofocus can’t read human emotion or nuance. An autofocus motor will set focus based on what it’s told by software. ‘This thing is in the middle, focus on that!’ However, as mentioned, sometimes the language of cinema will require focus to drift or sharpen or defocus unconventional parts of the image for artistic effect. People can make reactive, creative decisions about focus better than software can.
Second, autofocus is not always smooth. Over the years audience’s have become familiar with the more organic way that focus pullers change the focus using a human touch. Autofocus can sometimes feel overly jerky, too quick and precise, or laggy. Although new technology in this field, like the Preston Light Ranger 2, is rapidly advancing the capabilities of autofocus.
Third, it’s faster. Rather than having to programme a specific area in the frame for the focus to hit, or struggle with any technical glitches, 1sts can do it instantly.
And finally, this way of working has been established as the industry standard over decades. High end cinema cameras, accessories and even how shoots are managed and structured (such as having a rehearsal before shooting) is with focus pullers in mind.
AVERAGE DAY ON SET
Before the day of the shoot, a focus puller does a gear check. They will get a list of camera gear which the cinematographer has requested including lenses, the camera and accessories.
During the gear check they will assemble the camera, shoot lens tests using a chart and determine that all the gear that they have is functioning normally. If there are any issues with the gear they will consult with members of the rental house to fix it or source a replacement. During the gear check they will consult with other crew members on the shoot such as the DIT, VT, sound recordist, and grip to ensure that their gear works properly together with the camera build. For example if there’s a crane shot that the grip has planned then the 1st may need to source an extended power cable or build the camera with an extra iris motor to alter exposure remotely.
Once this is done they will mark up the lenses. This is a process where the distance markings on the lens are synced by either programming or manually transcribing the distances onto the focus rings which they’ll be using.
There are two kinds of follow focus systems which can be used. A traditional follow focus or a wireless follow focus. Both use similar principles but a wireless follow focus has become the standard preference nowadays.
The focus puller mounts the follow focus or wireless motors onto camera rods positioned under or above the lens. The follow focus gears or motor gears are aligned with the gear teeth on the cinema lens. The follow focus is then turned, either physically or using wireless motors and a handset, to change the focus distance on the lens. For each lens, the distance markings should match the markings on the focus ring. So that as the 1st turns the ring, the distance on the ring matches the focus distance on the lens. If you’re really working with no budget, have a super old school cinema lens or a stills lens without a focus gear, or don’t have time to attach and calibrate a follow focus, the focus can also be adjusted by directly turning the barrel of the lens.
The two industry standard wireless follow focus brands are Preston and Arri. But other brands such as RT Motion or Tilta can also be used.
On the day of shooting the focus puller will chat with the DP about what configuration the camera is needed in for the first setup and what focal length they would like to start on. They’ll then assemble the camera, put on a lens, a mattebox and any necessary filters.
If working wirelessly they’ll build their focus setup which will include a wireless handset, a monitor and a receiver which will get fed a live wireless image transmitted from the camera.
The camera will then be placed on a rig, such as a dolly, or handed over to the grips for more complex rigging or handheld work. The first shot is lined up.
The cinematographer will then work out what exposure they want and communicate that to the 1st. There are different ways of doing this. For example the DP may ask for a shooting stop, such as T/2, and then expect the focus puller to add or subtract the adequate ND filtration to achieve that stop throughout. The cinematographer may ask them to change exposure by adjusting digital camera settings such as EI. Or, if working on film, the DP may use their light meter to measure the amount of light, such as T/11 at 250ASA, and then expect the focus puller to calculate the correct amount of ND filters to add so that the lens may be shot wide open.
Once a shot has been lined up and everything is in place, the 1st assistant director will call for a rehearsal. The focus puller will use this time to practice and make any marks that they need to, usually coordinating with the actor’s marks that the 2nd AC will put down.
For example, they may see that the actor starts the shot at 10 feet from the camera and ends the shot at 5 feet. They then know what distance to start at and what distance to end on and can concentrate on getting the timing in the middle right as they roll the focus from 10 feet to 5 feet in time with the actor’s movement.
This is the traditional way of preparing for a focus pull. It was very necessary to work off distance marks when ACs were working on 35mm film, before the assistance of an HD monitor feed, as they had no optical reference to see if they were sharp and had to judge focus distance purely by eye.
As you can imagine this is an extremely difficult skill that took years of training and practice to master.
Now, with HD, and even 4K digital video feeds, focus pullers have the option to either: judge focus purely from looking at an image on a monitor, use a combination of judging distance, using marks and going off a monitor, or, rarely, pull focus completely old school without a monitor.
Film tended to also be slightly more forgiving than digital. This is because DPs working on film would usually give focus pullers a workable stop, for example T/4 instead of shooting wide open at T/1.3. The focus rolloff on film is also more organic and forgiving. There was more of a graduated roll off between the sharpest point of focus and what was out of focus. So, for example, if you are out by 6 inches on the focus on 35mm it may still look sharp enough.
However, because of the high resolution of digital cameras and the precise, modern optics they are paired with, if the focus is not completely on point it will probably look soft.
This makes using a monitor to judge or check, focus an important tool in the digital AC’s arsenal.
Nowadays, because of digital cameras not requiring expensive film stock for each take, rehearsals are becoming increasingly rare and the 1st AD may ask ‘to just shoot one and see what happens’ without a rehearsal.
When ‘roll camera’ is announced the 1st AC will roll, if there’s sync sound they will pull focus to the clapper board and then rack back to the actor or subject once it has been clapped, ready to pull focus for the scene. As they play out the scene the blocking may change or the actor may miss their mark or improvise. It’s the 1st AC’s duty to be able to adjust their pulling accordingly.
After completing a shot the focus puller may be asked to change the lens, filter or rebuild the camera, for a different configuration such as a Steadicam shot.
When shooting on film the focus puller is also required to change and lace the new magazine. They’ll check the film gate before moving onto a new shot to check that there isn’t any dirt or dust which would ruin the take.
TIPS
The cliche of the grumpy focus puller may have a grain of truth to it. This comes from it being a very stressful job on set.
If a high enough percentage of their pulling is out of focus, their performance isn’t up to scratch - or if the film negative in fact gets scratched - they stand the risk of getting fired.
So let’s go over some tips to avoid that from happening.
Every focus puller should know how to use marks and judge distance. An old trick is to carry a tape measure around with you, continually calculate distances in your head, then take out the tape to measure and see if you are correct.
Taking marks is a great way of laying a foundation so that you know where you stand. One way is to use start and end marks as mentioned, another is to use physical marks on the set for in-between distances. For example, if an actor walks up to a table halfway through a shot, the focus puller will measure the distance from the camera to the edge of the table so that they have an in between point.
These marks can either be mentally noted, physically marked on the focus ring with a marker or with what are known as arrows - pointed markers cut out of gaffer tape - or marked using different finger positions on the focus ring.
The only time focus pullers might set the lens to a different distance mark is when they split the focus. This is when they are required to keep two objects sharp which are different distances from the lens. In this case the focus is set to the distance in between the two objects until a middle ground is found where they are both sharp.
Always test to make sure everything is working properly and you are happy with your camera build before lining up a shot. No offence to the assistant directors out there but when they say “Just bring out the camera so we can have a look and you can build it later”...they rarely mean it.
Since camera technicians are dealing with electronics and software, which have a tendency to bug out from time to time, they need to be good at solving technical issues very quickly. When troubleshooting, always be methodical. For example if a monitor isn’t working first check the battery, then try a new SDI cable, then go to the menu to make sure the camera is outputting a feed or recycle the transmitter. Following steps logically and calmly will solve the problem as quickly as possible.
The job is largely psychological. You have to always be confident and calm. The more you begin to panic the worse and less accurate your pulling will get.
It also helps to know what variables will make your job more difficult or easier and what tools you need to assist you. Longer focal lengths, shooting the lens wide open, focusing on objects very close to the lens or using large format cameras will make the depth of field more shallow.
So if the DP decides to use a 150mm lens at T/2 with the actor running straight at the camera you need to control the situation because getting pin sharp focus will be extremely difficult. For example: you could ask the AD for a moment to take marks, you could use a focus bug for a distance indication or you could kindly ask the DP if they could stop down a bit to increase the depth of field.
A final way to make life easier is to be surrounded by a strong team.
Having a competent 2nd AC that ensures the camera is always running, gear is well organised, reloads happen smoothly, actors are always marked and the clapperboard is always put in the correct place, will decrease your workload and allow you to focus on the most important part of the job - the focus.

How Wong Kar-Wai Shoots A Film At 3 Budget Levels
In this episode I’ll take a look at 3 different films directed by Wong Kar-Wai at 3 increasing budget levels.

INTRODUCTION
Wong Kar-Wai has long been one of my favourite directors. His filmmaking is a high energy, super visual expression that channels the spirit of characters, places and emotions in an experimental form.
With a vividly saturated palette, a balance between chaos and beauty and a heavy focus on characters deeply concerned with personal, emotional relationships, Wong’s style has become synonymous with Hong Kong cinema’s 2nd New Wave.
As I do in this series, I’ll take a look at 3 different films made by Wong Kar-Wai at 3 increasing budget levels: the low budget As Tears Go By, the medium budget In The Mood For Love, and the high budget The Grandmaster, to identify how his filmmaking progressed throughout his career.
AS TEARS GO BY
Wong grew up in Hong Kong and after graduating got his first taste for film production work through interning at a TV network. He quickly began a career as a screenwriter, starting out in TV series and soap operas before moving up to writing film scripts.
Not all of this work was very creatively fulfilling.
Wong claims to have written over 50 screenplays during this time, most of which he was uncredited for. By the late 1980s he’d found a mentor in director Patrick Tam and wrote the screenplay for his film ‘Final Victory’.
It was intended to be the second installment in a trilogy of films that tracked some characters' in the underground world’s progressions from teenagers, to their 20s and their 30s. Wong imagined the first installment in the gangster film trilogy being ‘As Tears Go By’.
For some quick context, In Hong Kong in the 1970s and 1980s, a group of filmmakers emerged to form a movement called ‘Hong Kong New Wave’.
Although it was more an accidental outcome than an intended movement on the part of the directors, many of them were drawn to making genre films which included fresh, experimental elements that broke away from tradition and tread the line between art, political commentary and mass entertainment.
By 1987 the film industry in Hong Kong was prospering under this movement and seeking new films from new directors to continue this run of success. Using his industry connections from his time as a screenwriter Wong became a partner in In-Gear, a newly formed independent production company with producer Alan Tang.
He was granted considerable creative freedom to direct a film in the gangster genre - which tended to perform well financially at the time. For his directorial debut he returned to the idea of ‘As Tears Go By’.
Despite doing lots of research I wasn’t able to track down the exact budget that was green lit, but interviews establish that the budget was low by the standards of the time.
“Our intention is to make a gangster film without a hero. They are a failure. They are not successful. So they are not a big boss or a hero in the mafia world. They are just like a normal failure and how they deal with their problems. So I think already the film is not a genre film, even though it's named as a gangster film.” - Wong Kar-Wai
When it comes to writing, Wong takes an approach which breaks away from the norm. While many screenwriters start the writing process by developing a story and then slotting various characters into that story, Wong conceptualises characters as a starting point and then develops the story based on what he imagines the characters would do.
To him stories are far less important than characters.
As the characters come from him, the personalities of the characters cannot be separated from his own preferences. Perhaps this is why there are commonalities between many of the characters in his films.
His stories are also very influenced by locations - something we’ll return to later. In the case of As Tears Go By it’s set in an area of Kowloon in Hong Kong near to where he grew up.
When it came to directing the film he initially aimed to take inspiration from his directing mentor Patrick Tam:
“Patrick is a very organised director. He has all these storyboards and shot lists way before shooting. And he’s very precise about all of his shots. And I thought I’m going to be like Patrick or Hitchcock - everything is already decided. But then I realised the night before shooting I’m still working on the script. I tried to fix it. And I said, you know, I will wake up in the morning and will make a shot list at least. So everybody won’t be panicked. And the call time was 9:00 and I woke up at 8:00.” - Wong Kar-Wai
From this first ever day of shooting this became his de facto working style: arrive on set without much of a plan and build the film from there using the elements that presented themselves.
Wong, and his cinematographer on the project, Andrew Lau introduced many experimental visual elements into the film which Wong would continue to use throughout his later career.
As Tears Go By was photographed using interesting unconventional low angles, coloured neon lighting, a reactive handheld camera, and perhaps most notably step printing.
This technique, which became synonymous with Wong, is achieved by shooting at 12 frames per second, and then printing every frame twice. When the footage plays back at the standard 24 frames per second it therefore includes 2 printed frames of each single frame instead of 1. The result is a rough, experimental, jaring emotional effect where the audience is suspended in moments for longer and where time is distorted.
Lau photographed the film in the 1.85:1 aspect ratio. Wong would choose to photograph most of his later films in either this or the even squarer 1.66:1 - usually staying away from widescreen.
As Tears Go By established connections with cast and crew members that Wong would work with through the years such as actress Maggie Cheung and William Chang who worked both as an editor and as the overall art director in all of Wong’s films - doing the costumes, production design and providing an overall eye for the film’s aesthetic.
For a first film, As Tears Go By, carries remarkably similar trademarks to many of Wong’s later films, such as casting pop culture stars, experimental photography, musical motifs and a character focused, high energy story.
It was produced on a low budget by only hiring a small, core crew, containing the scope of the story, limiting the length of the production timeline, and shooting mainly on location without big set builds in lower budget locations in Hong Kong.
IN THE MOOD FOR LOVE
As Tears Go By performed remarkably well at the Hong Kong box office and kick started Wong’s career. After a string of commercially and critically successful films set in contemporary time, Wong embarked on making a period drama set in the 60s - which would be a sort of spiritual and thematic successor to his earlier film Days Of Being Wild.
In his unconventional style of working, Wong started doing little segments of unauthorised shooting without a script and began writing a rough treatment for a film - a loose guideline which he used to secure funding - which acted as a skeleton for the structure of the movie.
To sketch out the film he assembled a team of his frequent collaborators - actors, art director William Chang and the cinematographer who had shot his previous five films, Christopher Doyle.
“I feel very excited to work with a bunch of people around me and sharing the same spirit...It’s not only your idea. You have to visual the idea and you need the help or the collaboration with not only the cast but also the crew. Because I’m writing all the time it means that the film is in an organic form. It’s not fixed. I can’t write without knowing the space. I need to know where the story will happen and how the story will happen between who. I can create a story if I find an interesting space. But I cannot imagine something very abstractly on paper.” - Wong Kar-Wai
To find the right location for the film they initially scouted in Beijing but difficulties in securing permits and shooting permissions at short notice prevented this and Hong Kong was chosen as the backdrop for the story instead.
However, since many of Hong Kong’s locations had modernised since the 1960s, Wong and Doyle went in search of exterior locations which felt more correct to the period.
In Doyle, Wong found a collaborator for whom the space a film takes place in was an integral part of the story. Together they would carefully scout and select locations which informed the themes and language of the movie.
“We decided to shoot part of In The Mood for Love in the heart of Bangkok...So what do you say? For me there is something about this wall and the sense of loneliness. There’s something about the way in which it is falling apart. There’s something about the way when I first came here the light fell on this wall so that it gave it a texture...There is a sense of loss there.” - Christopher Doyle
Unlike other Wong Kar-Wai films - which were shot with very wide angle lenses (sometimes even as wide as 6.5mm) up close, personal and chaotic - In The Mood For Love took an approach to cinematography which was more detached and formal to emphasise a feeling of loneliness that the characters were experiencing due to their failing relationships.
Doyle shot the film with medium to longer focal lengths (often a 35 and 50mm from the looks of it), from further away, and used foreground in the majority of shots to further distance us from the characters and create a feeling of alienation, claustrophobia and separation.
“I just felt that giving one more layer of, one more level of, detachment. One more level of removal made it even more lonely. So we shot most of that sequence through here as a tracking shot. It didn’t happen because we thought it through. It happened because of this space, this light, with this particular possibility, gave us this moment.” - Christopher Doyle
Doyle photographed it on an Arriflex BL4, mainly using a dolly or sticks for slow moves or stationary frames. He likes operating himself with a fluid head such as an O’Connor 2575. He lensed the film with Zeiss glass, Super Speeds by the look of it.
The film was captured on higher speed Kodak stocks - 500T and 800T. This created an image with plenty of grain and texture while requiring less powerful lights to be used for the numerous darker night and interior scenes. He lit the movie with lots of undiffused hard light. This creates highlights in the skin and defined lines of shadow.
While he kept things relatively neutral colour wise, and seems to have used mainly tungsten lights for the tungsten balanced film stock, there were still moments where he gelled lights to create strong colour casts.
The costumes and overall palette from William Chang were saturated, punchy, textured and appropriate to the 60s.
Due to Wong’s method of finding the story while he shot without a script his shooting ratio - the amount of total footage he shot in relation to what made the final cut - was very high. He reportedly sometimes shot as many as 40 takes, which he used to find his vision by manipulating the camera, different performances, dialogue or thematic ideas from the actors.
This style of changing the story as he went, by introducing new scenes and ideas on the fly meant that In The Mood For Love went over schedule and over budget. So much so that Doyle had to leave the project near the end due to another scheduling commitment. He was replaced by Taiwanese DP Mark Lee Ping-bing who maintained the same visual language to complete the film.
Production finally wrapped after 15 months of shooting.
In The Mood For Love was therefore shot on a medium budget by maintaining a fairly small scope story, with few cast and crew members and no large set pieces. However its extremely lengthy production schedule drove up the costs.
THE GRANDMASTER
The director’s reputation for shooting over long production periods was pushed to the extreme on The Grandmaster. The initial idea that Wong put forward was to produce a documentary on martial arts. To prepare he went to various regions of China for a year doing research.
In 2009 he brought cinematographer Phillipe Le Sourd onto the project, without a script, to shoot material for a documentary or biopic about martial arts which was set in the 1930s, 40s and 50s.
It developed into a martial arts drama based on the life of Ip Man which was eventually shot over a period of three years.
“Every time and every day was a discovery with him about what could be the scene. Of course he was writing every night after the shoot...But you didn't know if the scene you would shoot for 2 days, 1 week, 10 days, or 2 months.” - Phillipe Le Sourd
His way of working opened up many possibilities which may have been impossible to see when committing words to the page or storyboarding a scene ahead of time. The locations may influence new angles, colour palettes or story ideas on the day.
However, the challenge of working like this for the cinematographer is to maintain a coherent look and continuity in lighting when the same scene may be shot years apart.
“The big challenge for me was to keep consistency...With the light I had to keep a diary every day about each shot we were shooting. One set we shot in 2009 and came back three years later...I was making notes on every shot about where I put the light, which colour I used, which light I used. Because I didn’t know if we’d finished a scene or not.” - Phillipe Le Sourd
At times he would show a photograph as a reference and at other times he would play music on set during a take for the camera and the actors to get a sense of the correct pacing, movement and rhythm that he wanted. He’d then turn off the music and repeat the take.
Le Sourd elected to shoot on 35mm for the textural component that it provided which he felt better represented the look of the period drama. They used Arricam Studio and Lite cameras with Cooke S4 primes for their ability to reproduce slightly softened, pleasing skin tones.
For the first time the director elected to shoot this epic in a 2.35:1 widescreen aspect ratio.
They went into the project shooting on Fujifilm Eterna 250D and 500T stocks. However since the shoot lasted over three years a problem arose. Fujifilm stock was discontinued by the company. The production was tasked with sourcing what was left of the 35mm stock from around the world. In 2012, to complete the film they finished shooting the last ever can of Fujifilm Eterna Motion Picture Film.
A few select slow motion sequences during fight scenes were captured in 2K with a Phantom Flex at 1,000 frames per second. The colourist then matched this with the Fujifilm footage during the DI.
As always, in post production the director was forced to cut much of the footage they had shot and find the film in the edit by distilling the story into its most important elements.
The Grandmaster’s excessive production timeline, as well as its more difficult to photograph set pieces, fight scenes, larger crew and extensive production design meant it was Wong’s highest budget film at around $39 Million.
CONCLUSION
Wong Kar-Wai directs like a writer - changing locations, themes and character motivations as he goes. For a writer all it takes is an eraser or a simple press of a backspace key. When making a film it’s a bit more tricky.
There’s a reason that the film production pipeline works the way that it does: with a carefully planned script, schedule and budget. It’s the same reason that most of Wong’s films went over budget and took large amounts of time to shoot while he found his story during the process of making it.
For all its logistical flaws, what his unusual method does provide is a massive amount of freedom to explore creative ideas and find possibilities which may not have been imagined initially by the writer.
His method may be unusual, but it has produced some of the most interesting and best made films of all time.
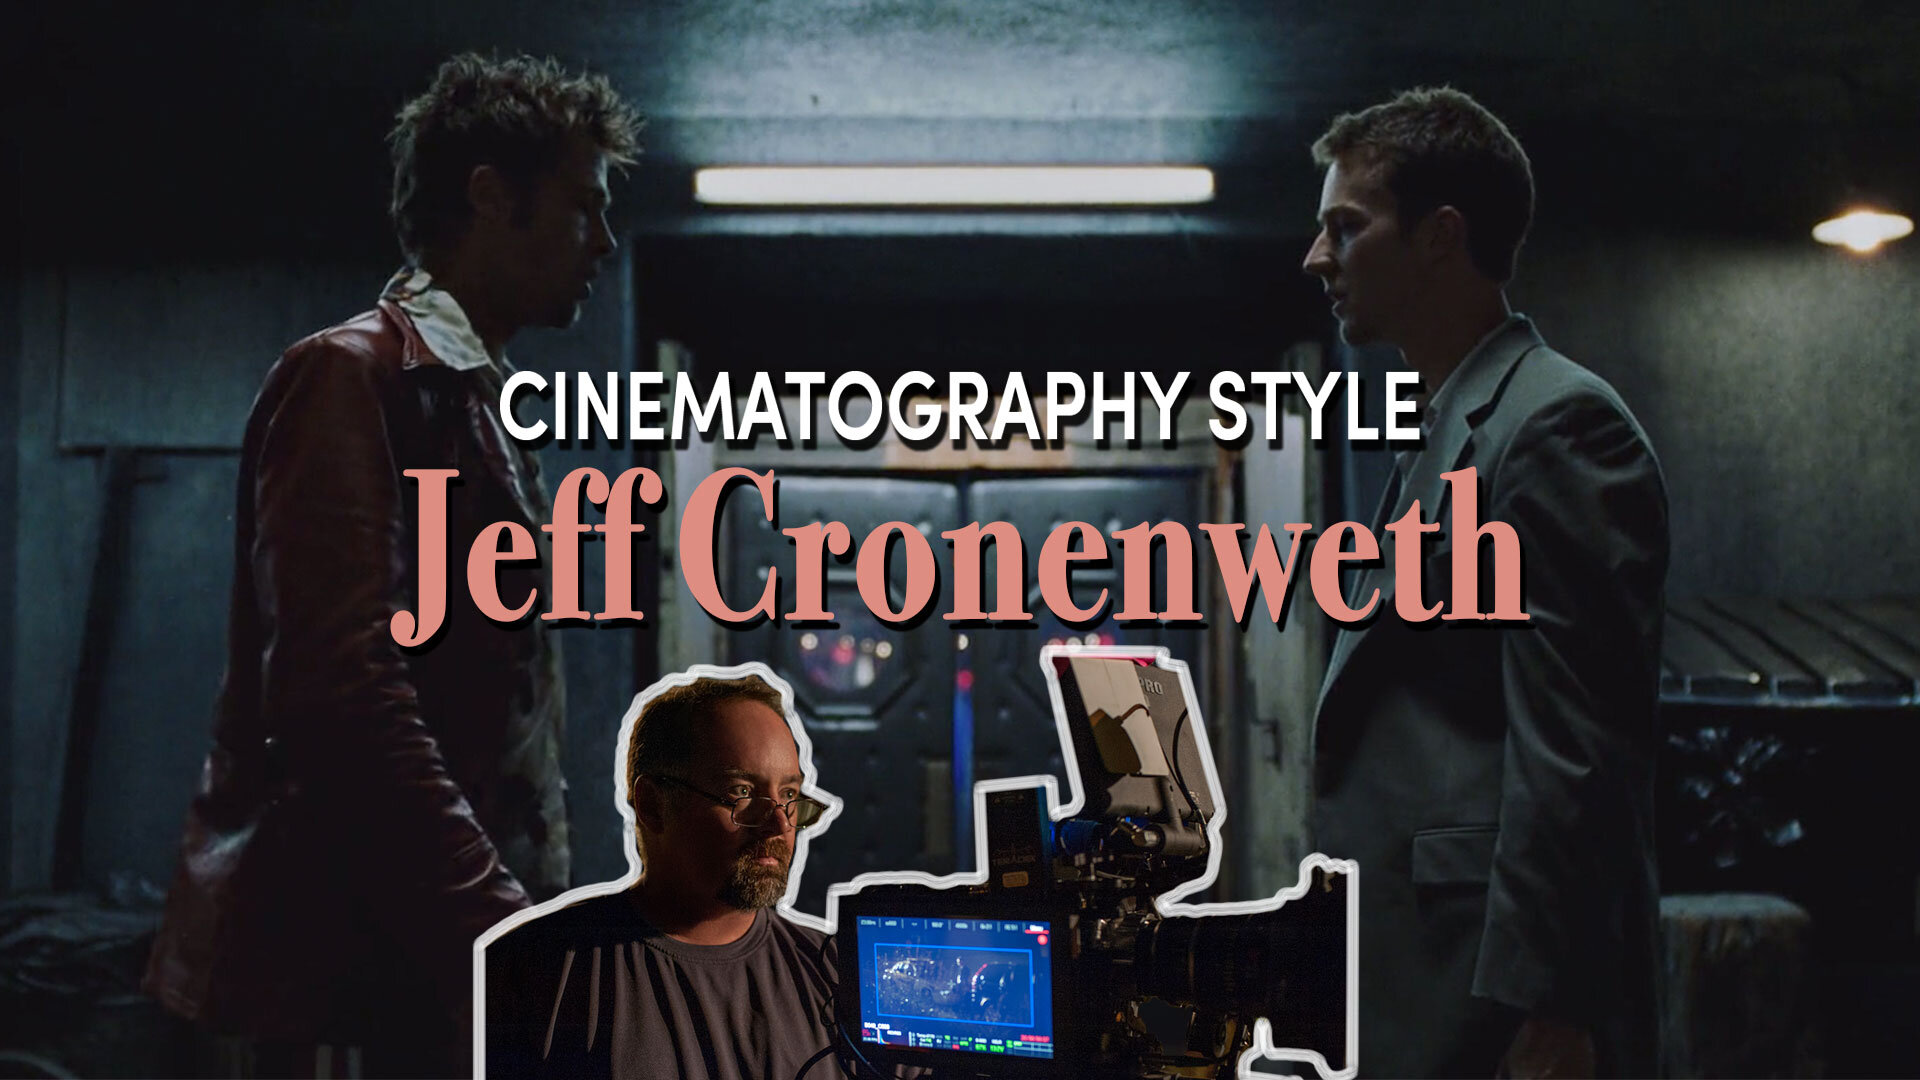
Cinematography Style: Jeff Cronenweth
In this episode I'll show how Jeff Cronenweth's philosophy on photography and the gear that he uses informs his own cinematography style.

INTRODUCTION
In this series I’ve mentioned a recent trend of some younger cinematographers being drawn towards what I’d call ‘dark photography’ - where the actors are underexposed, backlit or illuminated in a low-key style.
Although there have been other early pioneers of this dark style of lighting, such as Gordon Willis - who I made a video on - Jeff Cronenweth is a DP who, to a large extent, is responsible for popularising this style, through his work on movies such as Fight Club or The Social Network.
His photography regularly features a dark exposure, a subtly desaturated image, a use of soft toplight, naturalistic imagery and smooth cinematic camera moves.
In this edition I’ll look at Jeff Cronenweth’s philosophy on photography and show some of the gear which he uses to execute that vision.
BACKGROUND
Jeff Cronenweth’s background in filmmaking is basically the holy grail.
His father was legendary American cinematographer Jordan Cronenweth, known for photographing a number of classic films including his famous work on Blade Runner. His father introduced him to sets where he worked as a 2nd Assistant Camera during high school. After graduating he enrolled to study cinematography at USC and, post graduation, resumed working with his father, this time as a 1st AC.
During this time he worked for famous cameramen such as John Toll and Sven Nykvist, from whom he picked up lots of lessons and precious experience. In working with his father he was introduced to David Fincher, who Jordan Cronenweth shot for. During this time his father would let him do some of the on-set grunt work of lighting, placing the camera and operating.
Cronenweth was hired as B-Camera operator on Seven and served in a similar capacity on The Game. When it came to selecting a DP for Fincher’s next project Fight Club, Cronenweth got the call.
This accelerated his career as a feature film cinematographer.
He has shot feature films, commercials and music videos for directors such as: David Fincher, Kathryn Bigelow and Mark Romanek.
PHILOSOPHY
“You may not have a style. I hate it when people try to brand you and put you in a box because I think each opportunity creates its own opportunities to find something new. Even if it resembles something you’ve done before it’s still going to be something different.”
Like all cinematographers, Cronenweth’s style is flexible and changes depending on the suitability of the story.
The story should inspire the visual style. The visual style shouldn’t just be placed haphazardly on top of every story.
Although he hates to be boxed in, I’ll now try and do exactly that and connect some common threads that Cronenweth carries across various projects. Much of Cronenweth’s work uses naturalism or realism which he’ll then enhance for cinematic effect.
In Fight Club Fincher and Cronenweth created a visual contrast between Edward Norton’s nine-to-five life, which was lit and presented in a natural, reality-driven way, and Brad Pitt’s character, for which they wanted a more deconstructed, torn-down, hyper-real look.
This visual metaphor supported the change in the story from real and mundane to hyper-reality. It was done by gradually making the lighting moodier and darker, making the costumes and make-up more unconventional, and making the sets progressively dirtier and more extreme.
Another example of Cronenweth’s preference for naturalism can be seen in his use of practical lights, lights that you can see in a shot. He uses these practicals to motivate his placement of supplemental film lights, mimicking the direction, quality or colour of the on screen practicals. Likewise, he has also used the natural light that the weather offers up and supplemented it to feed the story.
“I think the weather depends particularly on the story you are trying to tell. In Girl With the Dragon Tattoo it needed to be cold and it was cold...and it was so imperative that that element, to some degree, was a character of the movie. In the setting it was imperative that you felt what these characters were going through physically in order to appreciate their journeys.”
Cronenweth uses his photography, particularly in his work with Fincher, to convey a more visceral feeling to the audience. The Girl With The Dragon Tattoo feels cold. Fight Club feels dirty. The Widowmaker feels claustrophobic.
He is able to do the job of a great cinematographer - convey a feeling using images.
GEAR
When preparing for a long form project Cronenweth does ample preparation by doing camera tests, going through various lenses, film stocks, lights or production design palettes, in order to set the look of the movie.
To prepare for Fight Club he tested different film stocks by pulling, pushing and flashing the negative. Flashing is where the photochemical film stock was quickly exposed to a tiny amount of uniform light prior to developing the film. Typically it was done at a film lab. This allowed darker areas of the image to show more detail, rather than reading as pure black.
Before digital cameras, he used film stocks from Kodak, such as their 250D, 500T and 100T emulsions.
When shooting on film he regularly used the Panavision Platinum, but also occasionally used Arri cameras such as the 435.
As digital cinema cameras became available on the market he made the change over to using them instead.
“I miss, like all of us, the texture and the quality of a projected film image and even to some degree that shutter which was comforting. But when you spend so much time perfecting an image and you walk in a multi complex and you walk from one screen room to the next screen room and it's completely different, I almost let go of it a little bit in order to get some of that control back.”
A large part of his preference for digital photography and digital projection stems from the consistency which they provide. When screening a 35mm print it may get scratched, be dirty, or the projector may be dim.
However when a digital projector screens a bunch of 1s and 0s from a DCP it should be more or less identical to the final image which the cinematographer saw in the grading suite.
Although he has shot on Arri cameras - I know because he shot on the Alexa Mini LF when I worked as a 2nd AC for him - he shoots much of his digital work with Red. He was an early adopter of the Red One MX back on The Social Network in 2010. All subsequent projects which he shot for Fincher he also used Red cameras such as the Epic MX and the Epic Dragon.
Another reason for using digital, especially when working with someone like Fincher who does lots of post production work and likes every shot to be stable, is due to its resolution capabilities.
On Gone Girl he recorded the entire sensor at 6k but framed for 4K by placing the image that he wanted inside the central frame lines. Therefore there was extra information on the outsides of the digital negative. This allowed the image to be stabilised in post production software, which used some of the extra information recorded, without needing to crop into the framed shot.
Cronenweth regularly shoots on spherical lenses, another preference that he picked up from working with Fincher. If he needs to frame for a 2.40:1 anamorphic aspect ratio he usually prefers to extract the ratio from Super35 than use anamorphic glass.
This is because spherical lenses come in a more flexible range, which include more focal lengths. They let in more light and can therefore be used in conditions with lower light - such as reading practical lights on a street at night. He uses various focal lengths and often opts for lenses with a good degree of sharpness such as Panavision Primos, Master Primes, or Leica Summilux-Cs.
Cronenweth achieves his so-called ‘dark look’ by regularly placing his lights overhead or behind characters, rather than directly from the front. Placing lights overhead, which is called top light, is a great way of creating a spread of ambient light to a scene. Since many interior locations do come with overhead lights, placing a light overhead is also a choice motivated by his desire to supplement reality.
He often uses lights like Kino Flos for this, rigged by his grip team.
Shadows cast from this light will fall straight down and you’ll often get a nice, soft, low level, return light bounced back up from natural surfaces such as tables. To separate characters from dark backgrounds he’ll then use a backlight or a rim light. This is a light placed behind the character which creates an outline of light that distinguishes them from a darker background. To save some detail in the shadows he may then fill in the scene with a low level light such as Kino Flo with diffusion from a 216 gel or muslin textile in front of the light. As a final touch to bring out a ping of light and presence in the eyes he may rig a low power light like an Obie or a small LED under the mattebox.
When it comes to moving the camera he tends to prefer using more traditional gear which creates classic cinematic movement, such as a dolly, a technocrane or occasionally a Steadicam.
If the budget allows, he’ll also opt for a helicopter with a stabilised head like a Shotover, over using a drone, for more dynamic and traditionally cinematic aerial shots.
CONCLUSION
Although he admittedly doesn’t like to be boxed into a particular style, if I had to box him in a bit I’d say that Cronenweth’s photography relies on more traditional Hollywood conventions, such as stable camera movement, while pushing the envelope with bold, dark lighting.
His camerawork of course isn’t a cinematic monolith and does adapt and contour to the correct shape of the story that is being told.
In so doing he uses a technical eye and experience to summon a feeling amongst viewers using nothing but 2D images.

How The Worst Movie Of All Time Was Made
In this episode I'll show how Natasha Braier's philosophy on photography and the gear that she uses informs her own cinematography style.

INTRODUCTION
When I pick topics to cover for this channel I try to provide examples from critically acclaimed works from some of the best filmmakers of all time. A lot can be learnt from greatness. But, maybe, a lot can also be learnt from a...well, lack of greatness.
In honour of In Depth Cine getting to 200K subscribers I thought I’d do something different and take a look at the making of a film by an unlikely auteur which many consider to be the worst of all time - The Room. Here we go.
PRE-PRODUCTION
Like any notable tale, the story of The Room came about due to the meeting of two unlikely friends. Greg Sestero developed an early love for film when he was young - going so far as to write a sequel to Home Alone when he was 12 years old, including an acting role for himself.
He worked as a model, picked up a role in an episode of a TV show and scored a couple of commercials. In an attempt to further his career he attended an acting class in San Francisco. This is where he met Tommy Wiseau.
Not much is known about Tommy.
Greg partnered up with Tommy in class - despite his tendency to give bizarre, over the top performances. They rehearsed sections from plays together which they would perform for the class and struck up a friendship, bonding over a shared love of James Dean.
Despite his very thick Eastern European accent he claimed to originally be from New Orleans. He drove a $60,000 Mercedes Benz, wouldn’t reveal his age, nor the source of his wealth. Although it does appear that he had a clothing company, Street Fashions USA, and handed out cards from this business.
During one of his classes Tommy had shot an 8mm short film entitled ‘Robbery Doesn’t Pay’. He had dreams of becoming an actor and a filmmaker.
Together, the friends decided to move to LA, where Tommy was already renting an apartment. Tommy bounced some of the ideas for films that he had off of Greg, such as the story for a vampire movie with the amazing title ‘The Vampire from Alcatraz: King of Vampires’.
This project never got off the ground.
While Greg’s acting career gradually progressed, Tommy struggled to land any roles, or even to get any call backs. Fed up, he decided to write his own screenplay - a drama about a love triangle (which was reportedly autobiographical) called The Room.
Upon reading the script Greg offered his opinion:
“I’d told Tommy what I thought about The Room several times, which was that the script didn’t make any sense. Characters’ motivations changed from scene to scene, important plot points were raised and then dropped, and all of the dialogue sounded exactly the same, which is to say, it sounded exactly like Tommy’s unique understanding of the English language. But nothing I said would ever change his view of The Room, so what did it matter?”
Nonetheless The Room began its preproduction journey securing funding from the only source willing to back the project...Tommy himself.
He created a production company, Wiseau-Films where he did everything from acting as the administrative assistant (under the pseudonym of ‘John’) to being the legal department. The credits did include two other executive producers, however one was his much older English teacher who had never had any involvement in film prior or since, and the other EP had been deceased for years already by the time of production.
Tommy brought on Greg as the film’s line producer, the person who manages the daily operations of a film shoot, despite Greg not knowing what a line producer even did.
When it came to casting, Tommy gave himself the lead and Greg organised auditions for the other roles. He cast an actor called Dan, who Tommy incorrectly always called Don, as Mark, the supporting character. Philip Haldiman was cast as the adolescent Denny, despite the fact that the actor was 26 and actually older than many of the other actors who were playing adult characters.
Initially they found it difficult to cast the oddly named Chris-R - the drug dealer character.
They consider doubling up and having Scott Holmes - who’d also been cast as Mike - play two roles and put on a strange Indiana Jones like disguise for Chris-R to prevent his double appearance getting noticed. They decided against it.
While holding auditions for other characters Tommy had to insist upon some actors that the film they were trying out for wasn’t porn.
With things falling into place, kind of, Greg and Tommy met up the day before the first day of shooting to go over things. At this final pre-production meeting Tommy managed to convince Greg to play the role of Mark - which had already been cast to Dan, or Don - by offering Greg a large acting fee and a new car.
PRODUCTION
On the first day of shooting Tommy was four hours late. This was a trend which would continue throughout.
Rather than shooting on location, Tommy made the unusual decision to shoot everything in a studio. Exteriors were shot in the studio parking lot with the help of a green screen.
They shot at the small Highland Avenue lot of Birns & Sawyer - a Hollywood rental house. This offer was extended by the owners due to the unheard of decision by Tommy to purchase, rather than rent, the film production gear - a financial decision which made no logical sense. It was reportedly a $1 million investment. However he took this illogical decision a step further by deciding to shoot the movie, simultaneously, using both 35mm and digital capture.
This doubled the cost of shooting as it required two separate crews, one to run the film camera and one to run the HD camera. Despite the crew’s insistence that he would either use the 35mm or the HD digital footage for the final cut, not both - Tommy went ahead with this bizarre decision anyway.
He purchased two Panasonic HDX-900 digital cameras, one Arriflex BL4 35mm camera and a dozen cinema lenses which included Cooke zooms. Most of the movie was shot off a dolly.
Raphael Smadja, an experienced French born DP who mainly worked in reality TV, was hired as cinematographer on the film.
He mainly lit the sets using strong sources of hard light, apparently undiffused, coming through windows. These lights often cast hard shadows against other actors which made it pretty obvious where the source of light was and wasn’t the most naturalistic way of illuminating a set.
At times, the DP would retreat from the camera to the director’s monitor - which was away from the set - while Tommy was performing a scene saying that he wanted to view the lighting from a monitor. However really it was because he struggled to stop himself from laughing while Tommy performed his lines.
He would routinely forget the lines that he wrote while acting. It became so painful at times that it took them three hours, many rehearsals and 32 takes to get one 7 second line. Tommy also appeared to lack any awareness of the correct emotional tone when performing.
The job of making sense of the script and ensuring continuity fell to script supervisor Sandy Schklair - who would change lines from the screenplay to make them more intelligible, block the scenes and generally act as a kind of 1st assistant director.
The rooftop set was created using three separate Styrofoam walls backed with cheap plywood hastily erected in the parking lot. Why the luxury apartment rooftop had a corrugated iron doorway no one quite knew. To get alternate angles the crew would move the three walls around to create the illusion of four. Sometimes their alignment was umm...questionable.
Since Tommy usually showed up late to set most of the rooftop scenes had to be shot in midday or afternoon light where the sun cast unflattering shadows on faces. To combat this the cinematographer used lots of overhead diffusion with textiles on frames to soften the light, which ate up shooting time.
When Don, cast as Mark, who hadn’t been told that Greg had been cast in his place, played out his scenes on the first day of shooting they didn’t roll any film on his takes. He soon found out, lost his temper with Tommy and Tommy fired him, along with another actress cast as Michelle. His reasoning for firing her as well was so that it would prevent any legal issues. Although what he meant by this exactly no one was sure about.
These weren’t the only people to leave. Fed up after weeks of shooting, Raphael the DP insisted that unless Tommy hired a proper line producer to handle the running of the shoot he would walk. When his demand wasn’t met he quit, followed by his crew who also resigned in protest.
Thus The Room hired its second DP, a guy called Graham, who was recently out of film school. After Graham walked around the set for the first time he immediately concluded that the production must be a money laundering scheme.
Tommy’s second DP didn’t last long. His reason for quitting was the result of another strange financial decision from Tommy. He refused to rent a generator for $200 a day to power the lights and instead lost hours every day as a result while the crew came up with work around power solutions - which was far more costly.
After days of promising a generator and not delivering Graham walked off the set.
This led one of the few remaining crew members from the camera department who didn’t walk off - Todd Barron - to step up as the third, and credited, cinematographer. He managed to get through the remainder of the shoot.
POST-PRODUCTION
Upon starting the edit the obvious decision was quickly made to dismiss all the HD footage that they had unnecessarily shot and only used the 35mm takes.
A problem soon presented itself - sound. Through a combination of the inexperienced sound recordist, an inability to sync up some of the dialogue sound to the footage and Tommy’s struggle with saying the lines, a lot of the sound was unusable.
They therefore embarked on using ADR, re-recorded dialogue in a controlled environment, to replace much of the location sound. This wasn’t exactly masterfully done.
Rather than carefully controlling the edit through deliberate cutting, the decision on when and what to cut had to be decided by the parts of the footage they had which were actually usable.
The pacing of the edit is another factor that makes the film feel so...odd. Certain scenes without much substance, such as the numerous sex scenes, take up about 10% of the total running time. They really go on forever. Also you can’t not laugh at the beyond cliche music choices.
With some digital trickery, and some questionable compositing, what is meant to be the San Francisco skyline was added to the rooftop scenes for the last touches.
The final budget, with its strange mix of gratuitous overspending and miserly cheapness, ended up being estimated around a staggering $6 or $7 million dollars.
Tommy marketed the film by renting a large billboard with his face on it for $5,000 a week. To some crew’s surprise the final film actually opened in a cinema. Its box office take - $1,900.
CONCLUSION
Over the years something interesting started to happen. It was so badly made and strange that it amassed a cult following. Fans from all over the world became enamoured with it and it entered popular culture.
Over time it actually managed to recoup its budget.
Perhaps his movie didn’t go exactly how he intended it, or maybe the problem was that it did go the way he intended it.
Either way the best, worst movie of all time gave Tommy Wiseau his dream of fame and celebrity that he’d spent his life seeking.
What Makes A Movie Great?
In this episode I'll show how Natasha Braier's philosophy on photography and the gear that she uses informs her own cinematography style.

INTRODUCTION
Art is subjective. Therefore it’s impossible to categorically state what a great or terrible piece of art is.
Nonetheless certain movies are held in high regard by a consensus of viewers and reviewers alike. So what exactly is it that makes certain films ‘great’? What is the magic formula that I can use to make my movie a part of cinema’s canon?
It’s hard to pin down exactly but in this video I’ll break down some factors which I feel contribute to movies being regarded as ‘great’.
STORY
One trademark that connects almost all great films is their story. Not only must the story be engaging but it must also connect with an audience en mass.
In the novel East Of Eden, one of John Steinbeck’s characters says, “No story has power, nor will it last, unless we feel in ourselves that it is true and true of us.”
I’d argue that part of what creates that magical spark that makes humans identify with a story is the tale’s ability to, consciously or unconsciously, reveal an insight about the world or the human experience.
From the beginnings of consciousness, humans have used stories as a way to communicate deep truths, messages or ideas - rather than just stating these ideas outright. Perhaps because a story is a more nuanced form of communication different people can take away different things from the same story.
As humans, our lives are also just one big story, so drawing theories, ideas, emotions, truths and themes out of narrative events is something which our brains are accustomed to doing. Many great films have the impact and longevity that they do by taking simple concepts and conveying them through story - almost like a fable.
District 9 uses a story about aliens to create a commentary on social segregation, xenophobia and South African history. Rather than using a complex wordy argument, the story itself conveys those ideas.
Or in Citizen Kane, which uses story to show a man who has to come to terms with the fact that people are not just the sum of their achievements and that money and power doesn’t buy happiness. Kane reveals a truth about life that we can identify in ourselves.
Most great films therefore have a story which is both engaging and which functions in presenting an insight, or truth, about the human experience.
CULTURAL IMPACT
Great films are a product of their time. They often represent a moment or period in a particular place in history and have a definite cultural impact.
For example, Taxi Driver visually represents the tone and feeling of the bleak, dark state that New York was in during the 1970s. Even if movies do not feature contemporary stories (are period or sci fi films) they often still carry traits which indicate or represent the feelings of the time in which they were conceived.
For example, Classic Hollywood cinema from the 1950s often displayed a more idealistic, romanticised optimism that was prevalent during the post World War Two economic boom.
This tone starkly contrasts many New Hollywood films from the 1970s which felt far more uneasy, realist and discomforting - a tone which reflected the economic recession, rising protests and growing disillusionment and fear about the Cold War.
The pieces that make up these films may age over time, the dialogue may become cliche, the costumes out of style and the performances over the top. However, as great films have a solid thematic idea at the core of their story, these themes will stand the test of time.
Like movements in art - with famous works from expressionists and post modernists - in film great movies are often selected and remembered which represent the time and style of the period - whether that be French New Wave, New Hollywood or Italian Neorealism.
TECHNICAL INNOVATION
This leads to another important aspect which contributes to a film’s greatness: it’s level of technical and artistic innovation.
Many great films are remembered for using cinematic devices in inventive ways which pushed storytelling forward and experimented with artistic conventions. This could be through the cinematography, editing, music or any other expression of technical creative decisions. This could be the dark lighting that set the tone in The Godfather, or the match on action cut that transported the story 1000s of years in 2001: A Space Odyssey.
When watching a great film, more often than not, nothing feels out of place or awkward. The audience just gets sucked into the story. We don’t question anything from a tonal point of view or point out technical flaws. This is the sign of a polished technical style.
CREATIVE SYNERGY
Not only do great films often innovate technically, but there is a high level of synergy between what is in front of the camera and the technical aspects that capture it. Things such as the lighting, camera movement and pacing in the edit are used to elevate and add to the story.
I’d attribute this synergy to a director who is able to create a singular artistic vision. One where the technical side is in sync with the artistic side which is in sync with the story.
That’s why some of the most well regarded directors often have a good degree of technical knowledge which they use to execute their artistic ideas.
SUSPENDING DISBELIEF
In a world where we as an audience have become acclimated to having tons of information available at the click of a button we are more familiar than ever with how things are constructed. The same applies to film. When people are more analytical and critical it becomes challenging to awe the audience.
Back in the day all it took was a clip of a train coming towards the camera to terrify and amaze folks. Today’s audiences are more demanding.
Whether a musical, a horror, a comedy, or a drama, great films are able to entangle the viewer. Getting them caught up in experiencing emotions because they buy into the world of the movie - suspending disbelief.
Great films therefore create a cinematic landscape which is both believable and sucks you in. Any time there’s a shaky performance, a bit of odd pacing or an unbelievable twist in the story, filmmakers run the risk of alienating the audience.
CASTING
Speaking of shaky performances, the final factor which I feel largely impacts a film’s legacy and impact is casting.
Coming back to my first point about the story, a great screenplay is meaningless if the on screen talent aren’t cast correctly and have the capacity to tell that story. Star power can help in this regard. Famous actors that are well cast in a great film, will retain that role as part of their legacy and solidify their character in the minds of the masses.
Whether through film criticism, popular culture or memes, a character that enters the canon of mainstream culture will increase the impact of the film.
Stardom isn’t a prerequisite though. Many great films have been made without stars, by lesser known actors giving stellar performances. The duty of holding up a story will always partially fall to the actors, so casting should never be underestimated.
CONCLUSION
The magic ingredients for greatness boil down to story, cultural impact, technical innovation, creative synergy, suspending disbelief and casting.
But there’s also a mystery surrounding greatness, a spark which sticks in the minds of viewers and places a film in the history books. Maybe it’s everything I’ve mentioned, maybe it’s luck, or maybe something else.
But what we do know is that it requires masterful filmmaking skills and a creative spark to ignite the fire of greatness.

What A Director Does On Set: Crew Breakdown
In this episode I'll show how Natasha Braier's philosophy on photography and the gear that she uses informs her own cinematography style.

INTRODUCTION
In this series I go behind the scenes and look at some of the different crew positions on movie sets and what each of these jobs entails.
If ever there’s one crew position that everyone has heard of it is the director. They are the person to whom the entire creation of a film is accredited to. You may know a bunch of famous ones, but do you know what their day to day job actually entails?
In this Crew Breakdown video I’ll go over the role of the director, break down what they do, what their average day on set looks like and some tips from some of the best directors out there.
ROLE
Unlike some of the other crew positions that I’ve previously gone over that are more technical, the director’s role is largely a conceptual one.
As the name suggests, they are responsible for ‘directing’ how the overall film is made by taking a script, visualising it and creating an overarching cinematic tone for the project. In doing so they guide the actors and the various crew heads of departments to realise the vision which they have.
Unlike most other crew members, who fulfil a particular niche in the film production process, directors are present throughout the entire making of the film - from pre production to post production and usually even after it has been completed - from distribution to promotion. As such they are responsible for a great many duties along the way and require a diverse skill set. Like with other big picture management positions, there isn’t a definite list of duties or ways of going about things.
Steve Jobs and Bill Gates had very different ways of doing things but both produced tech products - which were different, yet reflective of their individual philosophies.
A director’s level of involvement in these various duties will change from case to case, and usually includes - but is not limited to: casting actors, deciding on locations, production design and costumes, forming a visual style for how the film will be shot and edited, communicating and delegating that vision for crew members to execute, and overseeing the post production process - including the edit, colour grade, sound mix, selection of music and any visual effects.
Directors also need to be cognisant of the budget of the project and visualise and craft a film which takes that into account.
Some directors like to write their own screenplays, but this isn’t a prerequisite. Many others prefer directing scripts which are written by screenwriters.
The process of visualising a screenplay requires directors to make technical decisions to sculpt the visual language or vocabulary which ends up on screen.
“There are certain tools that you use and those tools become part of a vocabulary. That’s just as valid as the vocabulary that is used in literature…There was an intelligence, enough kind of intelligence, that was trying to tell a story through where the director, the writer, the cinematographer, where they were focusing your eyes.” - Martin Scorsese
AVERAGE DAY ON SET
Usually in these videos I start with how a crew begins their day on set. However in the case of the director their involvement in the projects happens long before this moment. Unless they are a ‘hired gun’ - employed to direct a project with the screenplay and many of the elements already in place - directors usually have to create their own work to some extent.
For example, in the world of commercials, directors will receive a brief from a creative agency which the client has picked. They will then use that brief to come up with a treatment or vision of how they imagine the commercial and then pitch that in order to win the job.
There are many ways a feature film can be made - but in most cases it will require the director to pitch their vision at some stage, whether for funding or studio approval. Unless it’s a totally self funded independent film, which is rare.
Once funding has been won and pre production begins, a director will start the process of casting actors, deciding on shooting locations and outlining their creative vision - through storyboards, a shot list or just conversations with key crew members.
Once everything is in place principal photography will begin.
A director’s day may start early by viewing some of the rushes (or dailies) - raw footage from the previous day of shooting. This informs future creative decisions which they must make, is a way of checking that they are on the right path and helps them to determine if they need to make any changes or do any reshoots.
Rushes could also be viewed at other times - when shooting on a digital camera - such as at night after the day's shooting, at lunch or at the end of a week.
Director's will arrive on set with a pre-planned schedule for the day detailing the scenes and shots that need to be covered. On arrival they’ll be presented with art direction-related decisions which need to be made such as confirming the costume of the on screen talent, adding or removing props or production design items from the set and sometimes commenting on the makeup required.
Most of this would usually have been dealt with in pre-production but sometimes these choices are narrowed down or finessed on the day of shooting.
The actors will arrive on set and do a blocking with the director. This is where they quickly run through the scene, determine how they will move in the space and their actions. The director will work with them here, giving their feedback or direction for how they see it playing out. The actors will leave the set and the director will then collaborate with the cinematographer and other crew members to decide on how best to cover the scene.
Some directors may be very technical and specific here and others less so.
Once the lights, camera and everything else has been set up, the actors will return to the set and do a take. Some directors like to call action themselves but more often than not that’s left up to the 1st AD.
In between takes the director will give feedback in an attempt to get the shot as perfectly as they can in the way in which they imagine it. It’s their job to know what they are looking for and to find it. They will sculpt a bunch of elements like they’re molding clay, making subtle changes to things like the performances, the camera movement, framing, or the blocking, until everything comes together to their liking.
Once they’ve got a take they are happy with, they will then move onto a new shot or scene and repeat the process.
TIPS
“It’s really hard to make a movie. It's like a two or three year process. You’re really married to it. I call these films my children...This is what I’ll leave behind. This is what my name is on...I put a lot of time, a lot of focus into it. So why do that for something that you don’t care about?” - Ava DuVernay
Unlike other crew who bounce around between projects with a greater frequency - directors are in it for the long haul. So pick the projects that you want to work on carefully - especially for directors who work in long form.
As I mentioned, there are many different styles of working. But having a broad skillset as a director is usually helpful. The more that you understand about the process - from casting down to the sound mix - the more you will be able to shape each facet of the process into the tone that you imagine.
The director’s job is all about making decisions. On set they may be faced with hundreds of little choices that need to be made every day. Cultivating the ability to quickly analyse a situation and make a firm decision is a crucial skill for anyone entering this position.
When making subjective decisions in the creative space there’s never one right answer. So perhaps the best approach is to make those choices by bringing yourself and your own background into the equation.
“Some of this movie comes from me, sure. But I’m never going to be able to make a movie that doesn’t. You know, even if I’m making a movie about the turn of the century I think it’s always going to be personal. It’s just in the ‘details stuff’.When I grew up in the valley I was really embarrassed for the longest time. That’s where I lived and that’s where I grew up. Cause I knew I wanted to make movies. I looked back to my favourite directors and said ‘Ok, there’s Howard Hawks and, boy, he served in the war and there’s Ernst Lubitsch and who escaped Germany...But I didn’t have s---- to bring. I’m from the f------- valley. And I was really embarrassed about that for a long time until one day I just woke up and said I guess that’s what I have to make movies about.” - Paul Thomas Anderson
While telling stories from your own point of view is valuable, it’s equally as important to use each scene and every creative decision to serve the thematic ideas in the story that you want to unpack.
Ask yourself why certain scenes are in the script and try to translate that why to the screen.
“Films are experiential and emotional. We all know that with storytelling in narrative fiction we can’t be married to factual accuracy. It’s all about what best serves the story. And so, I really started thinking about, you know, why I had all of these meal scenes. Aside from the fact that it's realistic. But what does that mean? What does it mean to this experience? How did it make me feel while I was there?” - Lulu Wang
CONCLUSION
Every director is different. Some rehearse. Some don’t. Some prepare everything. Some improvise. Some edit or shoot themselves. Some delegate and collaborate. Some are more technical. Some focus more on performance.
There is no general advice that can be given in this regard. Directors need to find their own voice and then use that as a guide in determining a way of working which is best for them.
After all, these different voices, visions and working styles are what makes film the artistically diverse medium that we all enjoy.

5 Rules For Effective Low Budget Filmmaking
In this episode I'll show how Natasha Braier's philosophy on photography and the gear that she uses informs her own cinematography style.

INTRODUCTION
Kevin Smith made Clerks with $27,000. Richard Linklater made Slacker for $23,000. Shane Carruth made Primer for $7,000.
Despite being largely self financed low budget projects, these films were all responsible for launching the careers of these directors. However, before we romanticise the potential of low or no budget projects too much, it’s important to note that for every success there’s also a gigantic heap of movies that, through luck or from being poorly made, never managed to find an audience.
In this video I’ll go over 5 tips which I think will enhance the strength of your filmmaking without breaking the bank, and give your low budget films a fighting chance at gaining recognition and launching your career.
PLAY TO YOUR STRENGTHS
When working with little or no money, you’ve got to accept and embrace that you won’t be able to control all aspects of production. So always play to your strengths and work with the resources that you do have available.
For example, Dave Klein, Kevin Smith’s DP on Clerks, initially imagined shooting the project in colour, however practical concerns made this a pipe dream.
“I think the look of that movie was mainly decided by the dollar. It was more cost effective to shoot black and white…You've got fluorescents but you’ve also got windows to deal with...we can use the tungsten lights that we have, mixed with the fluorescents which were there. Close the shutters. Kevin wrote that into the script - someone put gum in the locks. Then we didn’t have to worry about the windows that’s another colour temperature.” - Dave Klein, Cinematographer
Filmmakers, such as Christopher Nolan or even...myself and my director friend Greg, opted to shoot our first no budget feature in black and white for similar reasons. Rather than choosing colour and then fighting with colour temperatures, a lack of control over colour palettes and lighting, we choose to play to our strengths by embracing black and white and only focus on lighting contrast.
Another easy way to play to your strengths is to choose your shooting times carefully by shooting when the natural light will be best. The most effective way that I’ve found to play to your strengths is to first determine your budget, then sit down and allocate your resources appropriately.
Planning is your friend.
Although as a cinematographer I naturally want all the budget to be spent on those beautiful vintage lenses or on a bunch of HMIs - it’s important to understand that your loyalty should always be to the story. That’s why (even though it pains me to say it) budget should always be prioritised on getting experienced actors or locations rather than on renting top shelf gear.
It’s better to shoot on a DSLR from 2008 with a solid cast of actors than spend all the budget on an Alexa Mini and a set of anamorphic lenses while casting your brother’s friend who makes TikTok videos as the dramatic lead.
DIY CINEMATIC PRINCIPLES
A lack of money doesn’t mean that your movie has to look bad. Using the same cinematic principles that are used on high budget Hollywood films, but in a DIY way, is a great way of bumping up your low budget movie.
This could be done by using DIY rigs to move the camera - although don’t hold me responsible for the safety on these. Lighting with practical lights, or DIY fixtures assembled from a hardware store is another way to add to the look without spending much cash.
“I just chained up some fluorescent lights back there and I think we even put some halogen work lights...We took all the cigarettes out from above the counter and basically bounced the light off where the cigarettes would normally be.” - Ed Hapstak, Gaffer
For other ways to light cinematically without a budget, you can check out a video I made on how to light without any lights.
Learning how to grade footage yourself with free software such as Da Vinci Resolve, or wrangling a free grade from a good colourist, is also a great way of improving the look of your film without spending any money.
CREATE A LOOK (AND STICK TO IT)
“For Slacker I guess the original idea was the form of it. The way it wouldn’t be a traditional narrative...I remember I was driving to Houston I was like ‘Why can’t you just make a film where it goes from character to character?’ That could be a whole film. For me when it all started it was the formal kind of agenda. The formal aspects of the film. The cinematic qualities. That was my initial impulse.” - Richard Linklater, Director
Probably the best way to stand out or add so-called ‘production value’ to your project is to create a cohesive look or form for the entire project and then stick to it.
In the case of Pi this could be a super high contrast black and white look, or in the case of Slacker a series of long, linked takes, or in She’s Gotta Have It, consistently breaking the fourth wall in 16mm black and white with one 35mm colour set piece, or Tangerine which Sean Baker shot entirely on an iPhone.
Unless the look is intentionally a mixed medium film, cutting between footage captured by many different cameras, moving in arbitrarily different ways, with varied paced editing or inconsistently graded footage - will make the movie feel disjointed and amateurish.
Coming up with a set of rules, such as only using natural light, or only shooting on wide angle lenses, is an easy way to build a film with a coherent, deliberate vision.
This doesn’t mean you have to make it look like a Hollywood blockbuster. There are different ways of being cinematic and creating a coherent look or interesting form which works for the story. For example, the Dardenne brothers' exclusive use of rough, handheld work was appropriate for the documentary inspired Rosetta.
SMALL SCOPE STORIES
Your most valuable tool when it comes to creating effective low budget films is how the script is written. It’s great to imagine and write ambitious screenplays filled with car chases, plenty of guns and an ensemble cast. But if you are starting out or don’t have a budget to work with then you have to be realistic.
Write contained stories which are small enough in scope for you to effectively shoot.
The easiest way to make a bad movie is to try and produce a larger scope story than what the budget allows. The easiest way to make a successful low budget film is to come up with a great concept which can be executed relatively simply.
Some ways to reduce the scope of the story include shooting at limited locations, using a smaller cast, having limited or simplified set pieces and setting your story at locations which you will be able to have access to.
NAIL THE BASICS
Like with any form of art, in filmmaking you are free to express yourself however you like. But, a good rule of thumb is to first be confident in the basics before trying to be too experimentally ambitious.
Without the basics in place a movie is doomed to fail - even if it’s shot in an amazing single take shot with very technical blocking and has lots of fancy VFX work.
Don’t try to run before you can walk.
Make sure your casting is great, the performances are engaging, dialogue sound is good, you don’t jump the line with the camera, that your locations look realistic and that your story is strong. Once these foundations are firmly in place only then can you start taking risks.

Cinematography Style: Natasha Braier
In this episode I'll show how Natasha Braier's philosophy on photography and the gear that she uses informs her own cinematography style.

INTRODUCTION
When creating images as a cinematographer it may be tempting to succumb to a more visually conservative route suggested by the producer, client, agency, production company or anyone who is taking a financial risk on the project.
These parties often prefer visuals to be well illuminated without much shadow, sharp, with plenty of light on the actor’s faces, using literal rather than suggestive shots.
Throughout her career Natasha Braier has tended to stay away from these more traditional cinematic conventions by working with experimental collaborators, focusing on the essence of the story and committing to bold, riskier photographic decisions.
In this episode I'll show how Natasha Braier's philosophy on photography and the gear that she uses informs her own cinematography style.
BACKGROUND
After growing up in Argentina, Braier moved to Europe with her parents when she was a teenager. To deal with the move she picked up photography and soon became immersed in it - spending lots of time experimenting with chemicals and film in her dark room.
She was one of six aspiring cinematographers to get accepted to study her Masters at the National Film and Television School in England. After which she travelled and embarked on her career as a DP, before settling in the US.
She has shot a variety of content - feature films, commercials and music videos - for a range of directors such as: Nicolas Winding Refn, David Michod, Claudia Llosa and Alma Har’el.
PHILOSOPHY
“I was always quite experimental and searching for very alternative ways of photographing and trying to express emotions through light and framing.”
Part of what allows her to express herself through experimental visual forms is due to the directors which she works with.
A common thread throughout Braier’s work can be found in the thematic and emotional connections in the stories that she chooses to photograph. She is drawn to working with directors with a strong, sometimes extreme, visual personality. If they prioritize other parts of their filmmaking at the expense of a strong visual style then she’s less interested in working with them.
She does acknowledge that there are of course different ways of making good movies - which don’t always include a strong visual language - but she is drawn to those collaborators who don’t shy away from experimental or artistic risk taking.
Her experimental side can be seen through her use of expressive coloured lighting, dark exposure, unconventional framing and preference for an optically imperfect image - shot with older glass, softening filters and flares.
“I show them all the radical things I want to do and make sure that they want them...Look, this is what I’m doing. You won’t be able to make it lighter. Are you OK with this darkness? Do you like that the shadows are purple because you won’t be able to undo this?”
She likes making definitive creative decisions on set, leaving as little work for the colour grade as possible, and is sure to communicate and establish this visual language early on with the director. Her photographic goal is to transmit the essence of the story - which focuses on feeling rather than always providing clear narrative explanations.
Her sensibilities lie in the abstract which means she enjoys taking on projects where the viewer doesn’t necessarily have to ‘understand’ everything. But, she concedes that sometimes being more direct is necessary. Particularly when shooting commercials, where everything is already storyboarded.
Braier doesn’t box herself into always shooting in one style and feels that different perspectives are required for different projects with different directors. For example, with Honey Boy she says she adopted a more realistic, documentary gaze, whereas for Neon Demon an experimental, male gaze was necessary.
GEAR
While she adjusts her approach to shooting depending on the film, she does carry across similar techniques and gear choices from movie to movie.
For example, when it comes to lighting she likes using LEDs, to light a space 360 degrees, which her team rigs to a wireless DMX board so that she can do quick adjustments to lighting on the fly.
“I replaced all the practical lights with LED lights. I used transmitters and receivers. So I was at my monitor with a set of dimmers and I could control all those lights...Depending on what he was doing I was literally like a DJ, you know, like jamming with the dimmers around what he was doing...So in that way I could support the emotions with the lighting...It was really like a dance of light that I would do live.”
Working with a DMX board makes it easy to tweak lights quickly in shoots such as Honey Boy where much of the blocking of scenes was improvised during takes. It also allows her to dim or change the colour temperatures of lights during a shot.
She often uses lights from Digital Sputnik, LitePanels, or KinoFlos - which are manually gelled with different colours.
For years she shot projects on 35mm film - mainly Kodak tungsten stocks like 200T - but has recently come around to using digital cameras - for which she almost exclusively uses variations of the Arri Alexa, such as the Mini or XT.
When lighting for 35mm film she liked to use a light meter and view the image through the viewfinder. However with digital she prefers lighting using a calibrated monitor as digital cameras are more sensitive and act differently to the way film does.
She’s worked with lenses such as the Zeiss Ultra Primes in the spherical format, but mainly is drawn to using the anamorphic format - which she exclusively shoots with the vintage Cooke Xtal Express lenses. Although the Xtals are slower than modern anamorphic lenses and don’t have the best ergonomics, she finds their softer, dreamy look the most appealing out of the anamorphic choices available.
Braier likes baking in the final look as much as possible on set, by using techniques that can’t be undone in post production. Such as: placing effects filters in front of the lens or subtly flaring the lens with a small light to introduce a warmth to shadows and give the image a subtly vintage look - like flashing a 35mm film negative would.
“I designed two special LUTs with my colourist Alex Bickell from Color Collective in New York. We were trying to emulate Kodak 200T and get this kind of a more photochemical and also a little bit warm, nostalgic childhood feeling...Then we just used that LUT for the whole movie so that was kind of my negative.”
On set she uses this Kodak 200T LUT when she exposes the image in camera, so that when it comes to the grade 95% of the work has already been done - and only minor tweaks are made. She thinks the grade is a very important part of being a DP, especially when shooting digitally. Back with film, once the negative was printed there wasn’t much you could do to alter the exposure. But with digital it’s possible to light a scene really dark and then change it to look really bright in the grade.
Therefore it's important for a cinematographer to be at the grade to ensure the integrity of the image and protect the original intentions of the lighting.
Much of her work features handheld shots. She likes operating the camera herself, and still does so for commercials, describing the process as being like a dance between the operator and the actor. However, since doing features in the US, where crew unions typically prohibit the DP from operating, she now relies on her ability to communicate with an operator and collaborate with them to find the correct choreography for ‘the dance’.
CONCLUSION
Even though Natasha Braier’s cinematic gaze changes depending on the needs of the movie, her flare for photographic experimentation carries over to everything which she shoots.
Her love of colour, anamorphic lenses, dark lighting and unconventional framing are a testament to this.
Sometimes being photographically safer may get you more work, but sometimes having a bold eye and the courage to take creative risks will attract like minded directors, for whom the look of a movie is just as important as its content.

4 Ways To Light Cinematically Without Any Lights
In this video I'll go over 4 ways that cinematographers can control the contrast, quality and shape of illumination without even using any film lights.

INTRO
I feel that the term ‘cinematic’ has become an overused one lately - particularly on YouTube. And hey, I’m guilty of overusing it too.
However, the idea of ‘cinematic lighting’, which refers to the qualities or characteristics of light used in films are linked by some common traits: contrast - the ratio between the lightest and darkest part of a frame, quality - whether the light is hard, soft, textured or clean and the shape - how the light is controlled or manipulated.
In this video I will go over four ways that cinematographers can control these factors without even using any film lights.
WHY SHOULDN’T I USE LIGHTS?
‘Why shouldn’t I use lights’? you may ask.
Well the most obvious reason is to save money. These techniques are useful when you’re asked to shoot that short film for a favour that has no budget for gear.
Another reason is personal preference and an appreciation for natural light. I’ve worked with some DPs who like using a ton of lights and others that prefer to sculpt the ambient light on set.
Generally, manipulating illumination without lighting fixtures results in a more naturalistic looking image - which some DPs prefer.The choice to not use lights also comes with downsides.
Lights provide a consistent source of illumination, so shooting without them means that lighting conditions and your exposure may change while shooting a scene if the sun goes behind a cloud or shifts its position.
Also, maintaining ultimate control over illumination without lights may require large amounts of textiles and a big crew of grips to rig them and be on standby to alter the rigging as the sun moves. Which may take up more time and then kind of defeats the purpose of saving money.
NEGATIVE FILL
The easiest way to light without any lights is usually to reduce illumination.
One way to do this is with negative fill or ‘neg’. Rather than adding light on one side of the face to increase illumination and create contrast, negative fill creates contrast by removing light on the other side of the face, reducing illumination.
The colour black absorbs light and doesn’t reflect any colours on the light spectrum. So, bringing in a black textile close to one side of the face will remove light and create a shadow. Cinematographer can control light by placing a black surface wherever they don’t want light to be reflected.
“Generally my rule is any wall you don’t see put black on it. So, first thing I do when I go in a room, is I black the ceiling. That’s gonna give you better shape. It’s not always nice to have all this return on the face. I like stuff to have a little bit more attitude, even though it’s soft. And then if it’s blacking the floor or blacking a wall you don’t see to shape the light.” - Bradford Young
Since lighting like this doesn’t require an artificial source, it creates contrast and shape in a really soft and natural way.
Some common tools to do this include: a frame with blackout (such as a 8x8, 12x12 or 20x20 frame), a 4x4 floppy, the black side of a polyboard, or pieces of duvetyne (a matte black material). While these methods are common in the industry, any DIY method will usually work just as well, such as: placing a character next to a black or darkly painted wall, using any piece of black cloth that you have or even black bin bags.
Neg is a great way to create contrast on the cheap.
It should be noted though that the larger the negative fill and the closer it is to the subject the greater effect it will have. Don’t expect to hold up a black bag 5 meters away from a subject and get a strong shadow.
BOUNCE
While negative fill removes light, bounce adds light and works in an inverse way. For example, natural light from the sun can be bounced off a white or reflective surface to create a new light source. This light can be used to fill in shadows on the face or can be positioned as a key light.
To position the angle of a bounced light, first you find where the light is being bounced by angling the bounce at the ground, and then follow that bounced light as you change the angle of it and move the light into the correct position.
Usually a white surface is used for softer bounced light such as: from a frame with a white ultrabounce or muslin textile, a white polyboard, or foamcore.
“Then we just did bounce and tested 20x20 ultrabounce and 20x20 muslin, bleached and unbleached, and the muslin was the best one. Also because their costumes were made out of that similar material so it felt very organic…We just had three or four of those on set everyday, three 20x20s, four 20x20s, to control the contrast.” - Pawel Pogorzelski
For harder light with stronger shadows, reflective surfaces like a mirror can be used or a silver polyboard.
Bouncing can be a great way of softening and spreading the light source by using nature’s biggest, strongest, free light - the sun. The output of bounced light will however be lower than the direct source.
Again, it’s also possible to use homemade solutions to bounce light: from rigging up a bedsheet to using a handheld mirror.
DIFFUSION
Another way to soften light without bouncing it is the common cinematic technique of using diffusion. This is where a translucent modifier is added in between the light source and the subject to soften the contrast and shadow falloff.
For example, a 12x12 frame with a half silk material could be placed overhead between the sun and the subject to soften the intensity of the sunlight and even out harsh shadows.
There are many different materials that can be used for diffusion: such as textiles like silks or grid cloth, 416 gels, or even the diffuser part of a 5-in-1 reflector.
Again, DIY solutions are also possible, such as a bedsheet, paper or a shower curtain.
“We tend to use unbleached muslin which is lighter, thin canvas which light will travel through and diffuse much more...You can chop them up. You can put them on the floor. They’re much more versatile. You can wash them. Whereas with diffusion plastic you can’t. But in reality you can use whatever you want. You can go to Ikea and buy a shower curtain and use that.” - Julian White, Gaffer
Placing diffusion in front of a large natural source, like the sun, is a cost effective way of achieving illumination which is more beautiful, soft and cinematic than straight sunlight.
SHAPING
“Look, I was in a hole for a while where I always wanted to light from 3 quarters or the side and then I realised that you get into situations in a scene sometimes where it’s going to have to take place where the camera is at the window and your subject is facing the light source. My answer to that is tons of grip and cutting the light, teasers and all these things.” - Reed Morano
Shaping, or controlling, how light hits an object is an important aspect of creating cinematic illumination without any fixtures.
As Morano says, this can be done by placing lighting or grip tools such as flags in between the source of the light and the subject to affect the texture and shape of the illumination on surfaces.
Flags, black textiles mounted on various sizes of frames, can be used to block out certain portions of light. For example, so that light only hits a small area on an actor's face.
Some other shaping tools include nets, camo textiles, a cookie, or a dingle - a tree branch attached to a stand.
Production design items, such as curtains and blinds, are a basic way of naturally shaping light that comes in through a window. However, any household object can also be shifted in front of a source to shape the light.
CONCLUSION
Although it is possible to shoot and work without any film lights by using some of the four techniques in the video, that doesn’t mean it’s always advisable.
Most DPs use a combination of natural light and film lights along with negative fill, bounce, diffusion and shaping.
Being able to light scenes without lights, using the techniques in this video, will better inform your cinematography. So that when you do have the budget to rent lights you’ll already know how to adjust its contrast, quality and shape.

How Stanley Kubrick Shoots A Film At 3 Budget Levels
In this episode I’ll examine Stanley Kubrick’s approach to shooting 3 films at 3 different budget levels: Fear And Desire, A Clockwork Orange and The Shining.

INTRODUCTION
In the world of cinema, Stanley Kubrick is a household name. With a career that spanned multiple decades, he’s considered, with good reason, to be one of the most influential directors of all time.
Despite his longevity, his output of films was pretty low. In 39 years he made 13 films. Part of this can be attributed to him being a filmmaking perfectionist.
His movies typically involve expressions of inner struggle, supported by inventive photography, innovative editing and a strong use of, usually classical, music.
In this episode I’ll examine Kubrick’s approach to shooting 3 films at 3 different budget levels: Fear And Desire, A Clockwork Orange and The Shining to identify the similarities between the three films and how his way of working progressed over his career.
FEAR AND DESIRE - $53,000
“I then found out how much feature films were being made for, you know, millions, and I calculated that I could make a feature film for about $10,000...by projecting the amount of film I’d shoot, figuring that I could get actors to work for practically nothing. I mean at this point I was the whole crew, cameraman, assistant cameraman, you know, director, everything.”
Before he had even left high school, Kubrick took up photography and sold his first picture to Look magazine - where he was later hired. From looking at some of his early photographic work it’s easy to tell that he had an incredible eye for visual storytelling and framing.
However he had the desire to make the jump from the photojournalistic world into photographing moving images in the form of short documentaries.
His first documentary short, ‘Day Of The Fight’ was self financed independently and shot with the same careful framing as his photojournalistic work with Bell & Howell Eyemo cameras.
These compact daylight loading 35mm cameras allowed him to work quickly and use them handheld but their small 100 foot magazines meant that the camera could only roll for just over a minute before it had to be reloaded. After producing and selling a couple of these independent short documentaries he decided it was feasible to embark on a narrative feature.
He chose Fear And Desire, a screenplay with a small scope, contained story about an allegorical Odyssey on the philosophical and psychological struggles of war, which he could produce with his limitations. He calculated that he needed a budget of $10,000 to pay for production and again managed to raise the funds independently.
To save money, the entire production cast and crew consisted of just 15 people. The director, 5 actors , 5 technical crew and some assistants who help transport the gear around the mountain locations they were shooting in.
With the small budget he carefully planned out the film shot for shot beforehand - as he did not have the luxury of affording the film stock or time required to shoot excess shots. To reduce costs and maintain creative control, Kubrick served as both director and cinematographer.
He shot it on a rented Mitchell NC camera with a set of four Baltar lenses - a 25mm, 50mm, 75mm and 100mm. He also used the Eyemo again for certain scenes. He mixed 35mm black and white film stock from DuPont and Kodak, exposing only 50,000 feet of film, a fraction of what standard Hollywood productions used at the time.
The low budget also forced Kubrick to come up with inventive solutions to cinematography and filmmaking, something which he’d repeat throughout his career. For example, to achieve tracking shots without access to a dolly he used a baby carriage to move the camera.
For another scene where he wanted fog he got hold of a crop sprayer instead. Apparently the cast and crew were nearly asphyxiated because the machinery still contained some insecticide used for its agricultural work.
Despite Fear And Desire being a solid effort for a first film with bold ideas, Kubrick did make some technical mistakes during production, such as a scene inside a cabin where the action was incorrectly blocked and an actor crossed the line by entering the frame from the wrong side. Fixing it required flipping the 35mm negative in the printing process to preserve continuity.
Kubrick pieced the film together himself in the edit and used an array of unusual cuts, such as abruptly cutting to quick close ups of characters for moments of emphasis that suited the visual storytelling.
In the end principal photography was achieved on the $10,000 budget. However after forking out for recording sound, effects and a prominent classical music score in post production, the final budget ended up closer to $53,000.
Although not a perfect film - Kubrick would later disown it - it showed great promise for a debut low budget independent narrative feature without a full professional crew.
Fear And Desire also hinted at some stylistic traits which were carried over into his later films such as: realistic performances, a deliberate visual camera language, using interesting cuts for emphasis, a strong use of music and maintaining complete creative control by working with a small crew.
A CLOCKWORK ORANGE - $2 MILLION
“There’s this myth going around that Stanley is in complete control which is not true because Stanley never knows where to put the camera, he barely knows what scene we’re shooting. He comes in with no preparation. Any director who knows what he is going to do is a very poor director as he must use the elements, spontaneity that happens on the set. He’s able to do that.” - Malcolm McDowell
After a string of successful films Kubrick’s career had progressed from planning out everything beforehand - in Fear And Desire - to being allowed the luxury of spending time on set to work things out. After his work on higher budget, critically acclaimed releases such as 2001 and Spartacus, he wanted his next film to be less ambitious in scope - at the medium budget level.
While looking for a new story to shoot, he came across Anthony Burgess’ novel A Clockwork Orange. Kubrick was immediately attracted to it.
By this point, he had become a perfectionist who researched meticulously, with thousands of photographs taken of potential locations that he requested be within an hour and a half of his house.
During production, as had become his technique, he insisted on shooting a large number of takes with actors for most scenes until he had multiple takes he was happy with. Despite this, filming took place between September 1970 and April 1971, making it one of the quickest film shoots of his professional career.
A Clockwork Orange mainly used real locations situated around London and only two sets were built. Although many locations incorporated vividly colourful or bleak production design - depending on the psychological state of the character.
Kubrick’s reputation for perfectionism carried through when it came to photographing the film. Since first working with a DP on The Killing, he had insisted on retaining control over almost every visual component of production, from framing to even deciding on the lens used. He did however hire DPs to execute his lighting plans.
For A Clockwork Orange he called up English cinematographer John Alcott, who had previously shot the latter part of 2001.
To suit the dream-like quality of the film’s dystopian world, Kubrick decided to use a favourite lens of his, an extremely wide-angle 9.8 mm. This lens gave the image a very wide field of view which distorted and exaggerated the spatial relationships of locations and objects.
He shot it on the Arriflex 35 IIC for handheld as well as his own customised Mitchell BNC camera. It was shot on Eastman 100T film stock. The production used over 450,000 feet of film, which, when compared with the 50,000 feet used on Fear And Desire, gives you an idea of how many more takes he now did. He paired the camera with an interesting customised lens. To achieve extremely long continuous zooms he requested that the Angenieux 20:1 zoom be used. However, since it was built for 16mm film, and they were shooting on 35mm, it needed to be reconfigured with a 1.6x extender in order to cover the 1.66:1 aspect ratio without vignetting.
To give Kubrick the freedom to shoot scenes 360 degrees and to save on budget, Alcott did a lot of the lighting with practicals, such as Photoflood bulbs or fluorescent tubes which appeared in the shot. The lighting in the film mixes the well exposed high-key illumination in high society interiors with more low-key grungy lighting setups.
For a scene where a character jumps out a window, Kubrick again used an innovative camera technique where a crash cam, a Newman-Sinclair clockwork camera, was placed in a box and dropped from the window. It survived 6 takes.
A Clockwork Orange used its medium budget to create an experimental, highly stylised look, with an expanded scope story, which was shot over a production timeline shorter than many of Kubrick’s other films.
THE SHINING - $19 MILLION
“Filmmakers are encountering the problem of subconsciously, or unconsciously, of - what importance is a story. Is it more than just a way of keeping people’s attention while you exercise the most subtle aspects of the medium that you’re working with? Or is the story the most important thing or is the story just holding your interest? And the execution of the art form becomes what the audience is interested in.”
After the lack of commercial success and air of disappointment following Barry Lyndon, Kubrick sought to make a film which would be more commercially viable - while still being artistically fulfilling.
He settled on the genre of horror for his next project.
The story goes that while going through a stack of potential horror novels, Kubrick's secretary would hear the sound of a book hitting the wall as the director threw them into a reject pile after reading the first few pages. Until one day, when she no longer heard any more thuds of books hitting the wall, she went to check on him and found him reading The Shining.
Kubrick had enormous sets constructed on soundstages at EMI Elstree Studios in England for the interior shots in the film. Having all these sets constructed allowed him to shoot the film in chronological order, bouncing around from one stage to another depending on the scene.
“First of all, since it was a supernatural story, we didn’t want to have any impressionistic sets. We wanted it to look like a real hotel. And this is also carried forward into the lighting. You know, we didn’t fall into the trap of a haunted hotel look.”
By now, Kubrick’s directing techniques had evolved tremendously from doing very few takes in Fear And Desire out of necessity to doing absolutely tons of takes on The Shining over an arduous and lengthy production. To facilitate the long production window, which was over a year, he used a small crew.
His philosophy of being spontaneous on set also expanded to the point where he would constantly change the shooting script, sometimes even multiple times per day.
His reported mistreatment of lead actress Shelley Duvall, along with the lengthy and strenuous amount of takes per scene led to her falling physically ill due to stress to a point where, according to reports, Shelley was no longer representing a terrified woman; she was literally terrified.
Again, Alcott was called upon as cinematographer to technically execute the lighting for Kubrick.
It was photographed with an Arriflex 35BL as well as the IIC for certain scenes, with Zeiss Super Speeds and Cooke Varotal lenses. Again he used Eastman 100T 35mm film.
This time, Kubrick innovated with cinematography through the early use of the Steadicam, which had recently been invented. He got its inventor, Garrett Brown, to operate the Steadicam for shots which required a smooth, floating motion where dolly or crane use wasn’t possible.
Kubrick’s desire to view the Steadicam image at all times, without using cables, also led to innovations in wireless video transmission technology.
One famous example of Steadicam use was during the maze scene, which they shot on Kubrick’s 9.8mm lens with the camera 24 inches above the ground, chasing the action through the fake snow.
The Shining used its larger $19 million budget to construct enormous sets on various sound stages and shot meticulously with a large shooting ratio for over a year of production.
CONCLUSION
Stanley Kubrick was an independently minded director who did not like to be held back creatively by studios and over the years created a unique style of working which reflected this.
His working style grew from carefully planned low budget filmmaking all the way to taking over a year to photograph a feature with a high budget. His innovative, experimental style, supreme technical photographic knowledge and desire for ultimate creative control did however remain present throughout his career.
If ever there was a director who made sure to fully utilise all the funds at his disposal in the pursuit of bringing his singular artistic vision to the screen, it was Stanley Kubrick.

Cinematography Style: Marcell Rév
In this episode I’ll look at Marcel Rev’s philosophy on photography and show some of the gear which he uses to execute his vision.

INTRODUCTION
If I had to compartmentalise him, I’d place Marcell Rev in the camp of the new school of cinematographers who like to elevate on screen emotion visually by using higher contrast lighting with mixed colour temperatures, a darker negative and a combination of large format digital and film cameras.
The crux of his cinematography style comes down to the idea of ‘emotional realism’.
In this episode I’ll look at Marcel Rev’s philosophy on photography and show some of the gear which he uses to execute his vision.
BACKGROUND
Marcell Rev was born in Hungary and studied cinematography at the Academy of Drama and Film in Budapest where he attended a master class led by legendary DP Vilmos Zsigmond.
After starting his career working mainly in Hungary, he’s since transitioned to shooting a lot of US content. He works in short form on commercials and music videos as well as long form on feature films and series.
Some of the directors he’s worked with include: Sam Levinson, his father Barry Levinson and Kornél Mundruczó.
PHILOSOPHY
One of the directors which he’s probably most known for working with is Sam Levinson. They have a tight creative partnership.
When working together Rev tends to get involved from day one, being sent early drafts of scripts when the concept is still in the idea phase.
He likes getting involved before pre-production starts whenever possible, especially when working for a very visual director like Levinson. Together they will start collecting images, watching films and putting together some visual ideas.
“We collect these visual references. We discuss them and by the time we’re getting to like actual prep, we kind of know what the feel will look like.”
Identifying the feel or emotion behind the look is a crucial part of his process. I’d describe Rev’s stylistic philosophy as ‘emotional realism’ - a way of showing emotion in a more visually exaggerated way.
He often uses amped up cinematic choices, like slightly unrealistic coloured lighting for example, which elevates scenes out of complete naturalism, while the characters and story stay rooted in a more realistic approach.
The primary reference they came up with for Euphoria with its individual, ensemble cast members who are all linked together was Paul Thomas Anderson’s Magnolia.
They drew on some of the longer takes Magnolia used which involved intricate camera moves. To execute the carefully choreographed movement they had planned, Rev recruited Jeff Kunkel as his key grip, who had also worked on Magnolia. Surrounding himself with an experienced technical crew is an important part of Rev’s process.
On Euphoria, once they started pre-production with their visual style in mind they then collaborated to develop comprehensive storyboards for the show. Having these storyboards in place was a great structural tool, as it helped them plan out the difficult camera moves required and meant they had a solid plan going in.
Despite being grounded by a plan, Rev also enjoys moments on set where he can be more reactive and make flexible decisions which may go against the initial plan whenever it’s appropriate.
“I mean there are instinctive decisions on set. We always have a good plan. For most of the situations, for the entire first season we storyboarded and we came with a plan, but with Sam it’s pretty easy to change things on the day. If we feel like something would work better.”
An example of a more instinctive decision occurred on the Part One Special Episode in Euphoria.
The majority of the episode takes place in a diner at night in a long scene. Initially they had only planned to shoot a small portion of the scene at the beginning through the glass window from the outside to establish things and then jump inside to shoot the rest of the scene.
After seeing the 35mm film rushes from the first day, Levinson and Rev both liked the glass foreground so much that they decided to cover a significant portion of the scene from outside the diner and then use those shots when necessary in the edit. It was a risky move, since it was a very long scene and they only had a limited time to shoot it but ultimately it added an interesting perspective to the scene which they hadn’t envisioned in pre-production.
GEAR
To achieve a feeling of emotional realism, Rev has used different cameras, lenses and lights depending on the project’s requirements.
He loves shooting on 35mm film and claims it’s his medium of choice for most projects whenever it's feasible. He likes the Arri system and uses the Arricam LT as his go to 35mm camera. He has paired the Arricam with Eastman Double-X 5222 for a classically grainy black and white look on Malcolm & Marie, and almost always uses Kodak Vision3 500T for 35mm colour work.
However he does accept digital cameras are more suitable for other projects.
White God required working with dogs and rolling for extended periods of time to capture the right moments from the animals. In the end they shot about 170 hours of footage so elected to use the Alexa Mini at 2K for practical and financial reasons. The Alexa’s ability to shoot at 800 ASA with less light also helped him for night scenes where he couldn’t afford the large sources necessary to shoot on the less sensitive 500 ASA film stock which he likes to meter at around 320 ASA.
For Euphoria’s first season he elected to mainly go large format digital, shooting on the Alexa 65. He felt this format had a contemporary feel which suited the mood of the show. As the show and characters matured into the special episodes and season two he swapped large format digital for 35mm film.
However with digital he fights to make the image not feel excessively clean by dirtying it up with lots of atmospheric smoke or using vintage lenses such as the rehoused old glass found in the Arri DNAs.
“We found these amazing lenses for the Alexa large format. We tested with the DNA lenses. Arri is rehousing some old glass. I don’t know what they are, maybe Mamiyas or, I don’t know. They just have this amazing feel to it. And I found one particular lens, a 65mm focal length that we ended up shooting like 98% of the show on that one single lens.”
He’s also used other lenses such as Cooke S4s, Zeiss Super Speeds, Kowa Cine Prominar primes as well as zoom lenses such as the lightweight Angenieux Optimo range. He’s used these zooms to do push ins to direct the audience's focus to a particular character or detail in a shot.
As I mentioned, Rev uses light to evoke an emotional realism. He does this in part by mixing strong light sources with different colour temperatures and hues. He uses a lot of large tungsten units, mixed with LEDs and HMIs.
“I mean I love LED lights but tungsten units have a certain quality that you just can’t match, I think. And when I’m on stage most of the time I do direct sun with tungsten units and I just add a little fill or bounce with HMIs and I endorse that colour contrast. For night exteriors I use tungsten lights a lot.”
For one night scene at a carnival, his crew rigged four 20K tungsten fresnels on condors in different positions spread throughout the large set to backlight the scene. He hid tungsten maxi brutes behind booths and rides to backlight them and accentuated the rest of the set by including various practical lights in different colours in shot. He then used a big softbox rigged overhead as a toplight to provide soft, overhead, moonlight-esque ambient fill to the scenes.
To get a warm, cool colour contrast he regularly mixes the warm temperature of tungsten lights with HMIs gelled with a cool Cyan 30 or 60 gel. Even if these colours aren’t really realistic, they create a more emotionally exaggerated look, which suits the tone of the show.
To give a sense of chaos and introduce the space, as well as connecting various characters together at the carnival scene he used a Technocrane which dollied, jibbed and telescoped smoothly at various points during a long take.
A lot of his work is done either with a dolly tracking along a straight axis, or a handheld camera which he likes to operate.
CONCLUSION
Marcell Rev has used his skills and gear throughout his career to sculpt films with a bold visual style which isn’t always overly bothered with reality.
Instead his photography focuses on using cameras, lights and movement in creative and innovative ways to produce a response which appropriately represents the emotions of the story and the characters.

5 Tips To Improve Your Filmmaking Without A Camera
In today's video I'll look at five things that aspiring cinematographers and filmmakers can do to be proactive and build up their skill set when you don't have access to a camera or a set.

INTRO
Part of the trick to succeeding in the film industry means always being proactive, always looking for ways to get work and improve your skills. For those starting out it can be a bit demoralising to just sit at home waiting for the phone to ring with that next job.
So in today's video I'll look at five things that aspiring cinematographers and filmmakers can do to be proactive and build up their skill set when you don't have access to a camera or a set.
1. EDUCATE YOURSELF
Since we're living in a time with the easiest access to information ever it's a no brainer to use this to your advantage to develop your filmmaking skills.
When it comes to learning I'd say around 70% of it can be picked up from actively shooting and working on sets while around 30% of filmmaking can be learnt through education. Whether you agree with this percentage or not, it still makes sense for aspiring filmmakers, and even established ones, to expand the bounds of their theoretical knowledge.
This doesn't mean that you have to attend a film school. There are many free avenues for education which I'd recommend.
YouTube is a great resource when it comes to expanding your knowledge - if you look in the right places. I'd recommend balancing watching videos which are more technical such as camera setup videos, or cinematography workshops with interviews from some of your favourite filmmakers or behind the scenes videos.
Watching reviews of the newest or latest camera gear on the market is less important than educating yourself on core filmmaking concepts like lighting, focal lengths and blocking scenes.
Reading cinematography articles is another great way of learning. Again, looking at both technical articles such as American Cinematographer along with interview articles of cinematographers or directors that go over the philosophical decision making behind those technical choices.
If you're just starting out in film and are looking for physical reading material on filmmaking and cinematography some books I’ve found useful are: Painting With Light by John Alton and Film Art by Bordwell and Thompson.
There are also many people on social media posting their lighting diagrams these days. This can certainly be useful when you're starting out to get a sense of lighting concepts but I would caution people checking out these posts to use them as inspiration for their own lighting rather than trying to directly copy these setups.
2. OBSERVE
Your filmmaking skill set will come from physical application and practice along with the theoretical side.
I find a great way of working on a more tangible appreciation for lighting - without using any gear - comes from observing light in the real world. When lighting a scene, almost every DP begins by first being aware of what the natural light on a set is already doing and then building on that.
Actively observing natural light sounds simple but is a great way of building up a subconscious visual database in your mind of what kind of light you like and what kind of light you don't.
See what happens when you turn off lights in your house, close a curtain or open a door and stand in different positions relative to the light. Observe the nuances.
For example, if you like the look of light coming through a single window in a dark room then use that the next time you shoot by adding a light outside a window and turning off all the house lights. The more aware you become of how light naturally acts, the better you will be able to manipulate it when you are on set.
Observing life is also a great way of getting inspiration for your visual storytelling. The best filmmakers tend to draw from their own experiences when they produce art, so being conscious of your surroundings is always going to be helpful.
3. WATCH MOVIES
Watch movies.
No seriously. Watch movies, series, music videos, commercials, any filmed content. And I don’t mean just zoning out and binging on Netflix. Watch films with a critically aware eye.
Identify what you like about them and what you don't. If you have a favourite movie go back and watch it analytically and identify why you like it. You may find it's the framing, the writing, the editing, the camera movement, the lighting, the production design, or all of the above.
Whatever it is, store it in the back of your memory, in your subconscious visual database, which you can then pull out as a reference if a suitable project comes along.
Also having a deeper knowledge of film allows you to more easily communicate with your collaborators and crew by referencing a particular movie, shot or director.
4. NETWORK
You may be the most talented cinematographer in the world, but the reality is that if you don’t have a network of directors to work with you won’t be able to shoot anything.
As film production work is done on a freelance basis, you need to build up a network of contacts willing to employ you or collaborate with you.
This can be done in many ways such as: displaying your work online through a website or social media, attending film festivals and making contacts there, joining a crew agency who will put you forward with new contacts, communicating or reaching out to potential collaborators and production companies directly or making shorts with classmates at a film school.
It takes time and won’t happen overnight but establishing a range of relationships in the industry is the only way to ensure you get consistent freelance work.
5. PERSONAL SKILLS
To maintain your network of relationships in the industry you need a good level of social skills. It may seem obvious but, like in any occupation, having good personal skills goes a long way.
Plus, who wants to go through life being unnecessarily unpleasant to people.
Back in the day, at least in the industry I work in, there was almost an army-like mentality to crew. Where experienced, upper rank crew members trained apprentices or assistants starting out through, how do I phrase this, verbal and emotional abuse.
This was meant to both toughen up newcomers and scare away those who wouldn’t last in what is a tough industry.
As this approach is definitely getting phased out of the industry now with newer generations rising up the ranks, these kinds of ‘social skills’ are no longer tolerated as they once were.
Yes, it’s an extremely stressful job and yes, you are often running on minimal sleep and working very long hours. So finding a way to deal with these factors and still maintain a cool, calm, confident and likeable persona on set is a must. Again, there are many ways I’ve found to go about this from meditating or taking a deep breath, to forcing yourself to slow down for a minute and think about each decision you make on set rationally.
However you want to better your personal skills and ability to deal with stress is up to you, but is definitely a crucial part of your filmmaking that you need to develop.
CONCLUSION
Working on all of these facets unrelated to the technical side of making movies is just as, if not more important.
It’ll put you in the best possible position so that when an opportunity to shoot a project does arise you feel confident to shoot it to the best of your ability.
If you also want to look your best on set, you can check out the new merch that I’ve launched by clicking the link in the description, which has amazing original illustrations specially for people who love film. Otherwise until next time, thanks for watching and goodbye.

Popular Grips Rigs For Cinematic Camera Movement (Part 1)
The grip on a film set is responsible for the technical execution of camera moves using various rigs and pieces of gear which have become standardised across the film industry. In this video I’ll look at a few of the most popular grip rigs - the fluid head tripod, the dolly, the technocrane and the hostess tray.

INTRODUCTION
One of the keys to creating so-called ‘cinematic’ footage comes from the way in which the camera is positioned and from how it moves during a shot.
The grip on a film set is responsible for the technical execution of these moves using various rigs and pieces of gear which have become standardised across the film industry.
In this video I’ll look at a few of the most popular grip rigs which are used by cinematographers, how they move the camera, their basic setup and what kind of shots they are typically used for.
FLUID HEAD TRIPOD
Let’s start with the most basic piece of gear that everyone knows about - the tripod.
Film production tripods are split into two parts: the head, the upper part where the camera sits which can be panned or tilted, and the legs, the base which remains rooted to the ground. Typically, film productions carry two sets of legs, talls and shorts, and one head which is swapped between the legs. The required camera height determines whether talls or shorts are used. For shots with the camera very close to the ground a low boy can be used.
Heads come in two different types, a geared head and a fluid head. Since it was introduced by Miller in the 1940s, the fluid head has become the most popular head in the film industry due to its ease of use and ability to do quick pans and tilts. They are operated by moving around the pan handle manually.
Before their invention, operators could only use heads which were turned by gears meshing together and operated by rotating different wheels for pan and tilt. Some operators still prefer using geared heads such as the Arrihead 2 as it gives smoother motion than a fluid head.
As mentioned, a fluid head can be used with legs, but is also compatible with other rigs such as a ride-on crane or a dolly.
It’s used in a tripod configuration for locked off shots where the camera doesn’t move or for shots which require panning or tilting the camera from a stationary position.
By far the most common fluid head used for film production today is the O’Connor 2575. However there are other brands used such as Cartoni or Sachtler.
To work the head, a baseplate is attached to the bottom of a camera by screws. This baseplate then slides backwards into the camera platform on the head and is locked by pulling the front camera plate lever across. If you release your hand from the camera it will now either be front heavy, where it’ll start to tilt down by itself or back heavy where it’ll tilt up. To rectify this unlock the platform release lever on the side of the head and slide the camera platform forwards or backwards until the head is balanced and it doesn’t tilt by itself.
There’s a tilt lock on the side and a pan lock on the front. You can also change the amount of resistance the head gives when operated by changing the counterbalance. Heads always come with a bubble to check whether the camera is level with the horizon plane. To even out the head each leg of the tripod needs to be adjusted up or down until the bubble lies in the centre.
DOLLY
Next up, a piece of gear which is probably most associated with achieving so-called ‘cinematic’ camera movement - the dolly. A dolly is a weighted, wheeled cart which is pushed by a grip or dolly grip to create smooth movement on a horizontal axis.
They come with a hydraulic arm, which the camera sits on attached to a head, that can be raised or lowered smoothly by turning the valve control handle. The arm comes padded with velcro so that markers can be placed to signify a starting or end point of a hydraulic move. Dollies are steered and pushed using a handle.
This means the camera can be pushed forwards or backwards on an axis as well as raised or lowered during a shot.
A dolly comes with wheels which can either slot onto a track for smooth movement over rough surfaces or be used on even, stable ground such as on the floor of a house.
When using tracks, the DP will decide on a position and length of the move, a team of grips will lay tracks down and then use wooden wedges, packing or apple boxes underneath them to make sure they are completely level - with the help of a spirit level. Once the track is level the dolly will be picked up and placed on the track.
It can take up to four people to pick up a dolly, one person lifting from each wheel, since most weigh upwards of 127kg without a head or a camera. Their excessive weight may make them cumbersome to pick up, but it ensures maximum stability and smoothness when they are pushed.
Many DPs like to use dollies even for shots where the camera may remain stationary, as they make it easy to quickly reposition a heavy camera and find the perfect frame by wheeling it around or jibbing up or down.
It’s also possible to use the dolly without a head, for example with the operator sitting on it with a handheld camera or with the camera suspended from a bungee rig for a looser handheld feel that requires tracking motion.
Other rigs like a slider or a jib arm can also be mounted on a dolly for additional movement possibilities.
There are two brands of film production dollies - Chapman Leonard and J.L. Fisher. The PeeWee series from Chapman are probably the most popular used today.
TECHNOCRANE
While the dolly allows filmmakers to achieve a wide range of smooth movements, a Technocrane or telescoping crane takes that to the next level. However, it does come at a cost, being one of the most expensive pieces of grip gear to rent along with requiring specialised crew members to operate it.
Technocranes allow camera moves on every axis. They can be mounted to a track with dolly wheels to move forwards and backwards on an axis. The camera is mounted on a remote head which can pan, tilt or even roll the camera. At the same time the crane arm can swivel around and jib up or down. And finally, it has a telescoping arm, which allows the camera to extend or retract remotely. This makes the technocrane suitable for large budget productions which require complex camera motion.
A technocrane comprises a base with four wheels used for transportation (which can be swapped out for dolly wheels) and an arm.
Different technocranes come with different lengths of telescoping arms. For example a SuperTechno 30 can extend its telescopic arm by 22 feet. When the arm extends a weighted section moves backwards down the arm proportionately to keep the crane balanced.
Operating a technocrane requires a few crew members. A grip holds the back of the crane and controls how it swings and jibs. Another grip then holds a control in their hand that they push to either extend or retract the telescopic arm, kind of like a zoom in or out control on a camera.
To achieve complex moves safely requires skill, experience and communication - which is why the grip team and the DOP will usually communicate using wireless headsets during this process.
Some brands include the SuperTechno and the Moviebird, with the SuperTechno 30 and 50 being popular models. Moving around a technocrane is not a quick or easy process, with the SuperTechno 50 weighing in at over 2,500kg and requiring its own truck to transport it to location.
This, along with their price tag, means they are usually used exclusively for individual, pre-planned shots rather than as an everyday tool for moving the camera around.
HOSTESS TRAY
Finally, let's look at a type of car mount which is used to film profile shots from the side of a moving vehicle. The hostess tray gets its name from its likeness to the tray stand that held food which used to be attached to cars at a drive-in. This rig mounts a cheese plate to the open window of a car and is typically secured at the bottom by poles attached to suction cups which are mounted onto the car to form a triangle between the tray and the car.
A camera plate can be attached to a leveling head or directly onto the cheese plate and manipulated to find the desired angle and framing. The camera is then securely locked off so that it cannot move during the shot.
This allows us to get footage with stationary framing from the outside of a moving vehicle. As it’s directly mounted on the car, any vibrations or bumps from the road will be felt in camera. This provides for a tactile car shot.
Rigging a hostess tray to a car should always be done by an experienced grip to ensure the safety of all involved in the shot as well as the camera gear.
There are different manufacturers of these mounts, such as Matthews Studio Equipment or Grip Tech.