How This Series Was Filmed In Only 1 Shot: Adolescence

INTRODUCTION
A number of productions have tried to pull off shooting large portions of a movie in only one single shot to give cinema the illusion that it’s playing out in real time. However, many of these productions do this by using invisible cuts: stitching two different shots together during a whip pan or with a wipe.
Adolescence is different. Unbelievably, this four episode series directed by Philip Barantini and shot by Matthew Lewis, decided to attempt the impossible and shoot each of these approximately 60 minute episodes in one, single take. In real time without any post production trickery that moulded different shots together.
CAMERA SETUP
To do this, they needed to come up with a system for operating the camera in a stabilised way for extended periods of time. After testing various options Lewis landed on DJI’s Ronin 4D with a Zenmuse X9 6K camera.

There were a few reasons for this. Firstly, they needed a gimbal system which would stabilise the camera movement. Not only does the 4D have a 3-axis gimbal which smoothes out the tilt, the up and down motion, pan, the side to side motion, and roll, camera rotation, but it also has a 4th type of stabilisation.
It comes with an arm that the 3-axis gimbal sits on that can isolate and get rid of the excessive up and down motion that comes from the footsteps of the operator when walking or running.
This was needed for some of the fast moving camera operating that would need to be done, as well as for hiding the motion of camera handovers - where the rig would be passed from person to person - or, even, from person to drone.
Secondly, at around 5kg, this camera was lightweight - compared to most high end cinema cameras at least. The operators could therefore handle the camera for longer periods without introducing camera shake from tired arms.
Although for episode three, which took place in one room and was solely operated by DP Matthew Lewis, he used a Tilta Float to reduce the strain of the gimbal system on his arms.
This features a vest with a stabiliser arm that the gimbal system attaches to - taking weight off the operator and keeping camera movement - especially slow camera movement - even steadier.
The full-frame Zenmuse X9 comes with an interchangeable lens mount which meant that Lewis could use a cinema lens.
He chose to shoot the entire series on a little 32mm Cooke SP3 at a stop of T/2.8. These lenses were lightweight enough to be supported by the gimbal’s payload, had the focal length he was after, came with the beautiful Cooke look and it was capable of mounting a front variable ND filter system.

The SP3s come with gear teeth which were lined up with a lightweight follow focus motor. Focus Puller Sean Beasley did an incredible job of keeping these entire long takes in focus, using a DJI high-bright monitor with a FIZ handset, along with DJI’s lidar system which could be used as an autofocus tool on these manual lenses to track subjects and keep them sharp.
CAMERA MOVEMENT & GRIPS
While Lewis used the 4D gimbal for much of the movement, there were also a few occasions where they had to use some other rigs.
Excluding episode three, each operator would usually carry the camera for around five minutes or less before passing it off to another operator. This passoff was either done so that they didn’t lose too much energy and start to shake, or because the camera needed to be put into a new configuration, or go through a narrow space like a window.

For example going from handholding the gimbal to positioning it on the Tilta Float arm, or even going from a crane on a vehicle to handheld gimbal mode - like they did in the first episode.
As well as being controlled by a gimbal operator the 4D can also be wirelessly controlled by an operator using DJI Master Wheels. This shot started on a jib arm mounted to a vehicle. Next to the driver a camera operator could pan and tilt wirelessly using wheels.
Once it came to a stop another operator could grab the 4D off the jib arm then continue to use it as a handheld gimbal all the way inside the house.
CAMERA MOVEMENT - EPISODE 2
While all this camera gear made it technically possible to shoot these long takes, designing and executing the camera motion was a whole other creative and practical undertaking - that required hundreds of different calculations.
Adolescence at its heart is a social realism story which looks at a multi month ordeal in just four different vignettes or moments. Playing these situations out in single takes makes the audience feel almost like an omniscient observer who floats around with different characters witnessing the action unfold in a real time, immersive experience.
The director, DP duo did a similar thing on their earlier film Boiling Point which was also filmed in a single take. Although that movie was shot handheld on an Easyrig and to me had a bit more of a documentary feel, the floating camera of Adolescence gives the footage more of an ethereal feeling, like we’re floating around as a spectator to a realistic theatre production.
Nowhere was this feeling stronger than towards the end of the second episode where, in a surreal moment, the camera finally drifts off a character up into the heavens, soars across the town, and latches onto another character.

Rather than walking the camera on the ground between the two locations as was originally scripted. The filmmakers felt flying the camera would make the audience feel it wasn’t attached to and operated by a person which would create a more ethereal sensation and perspective.
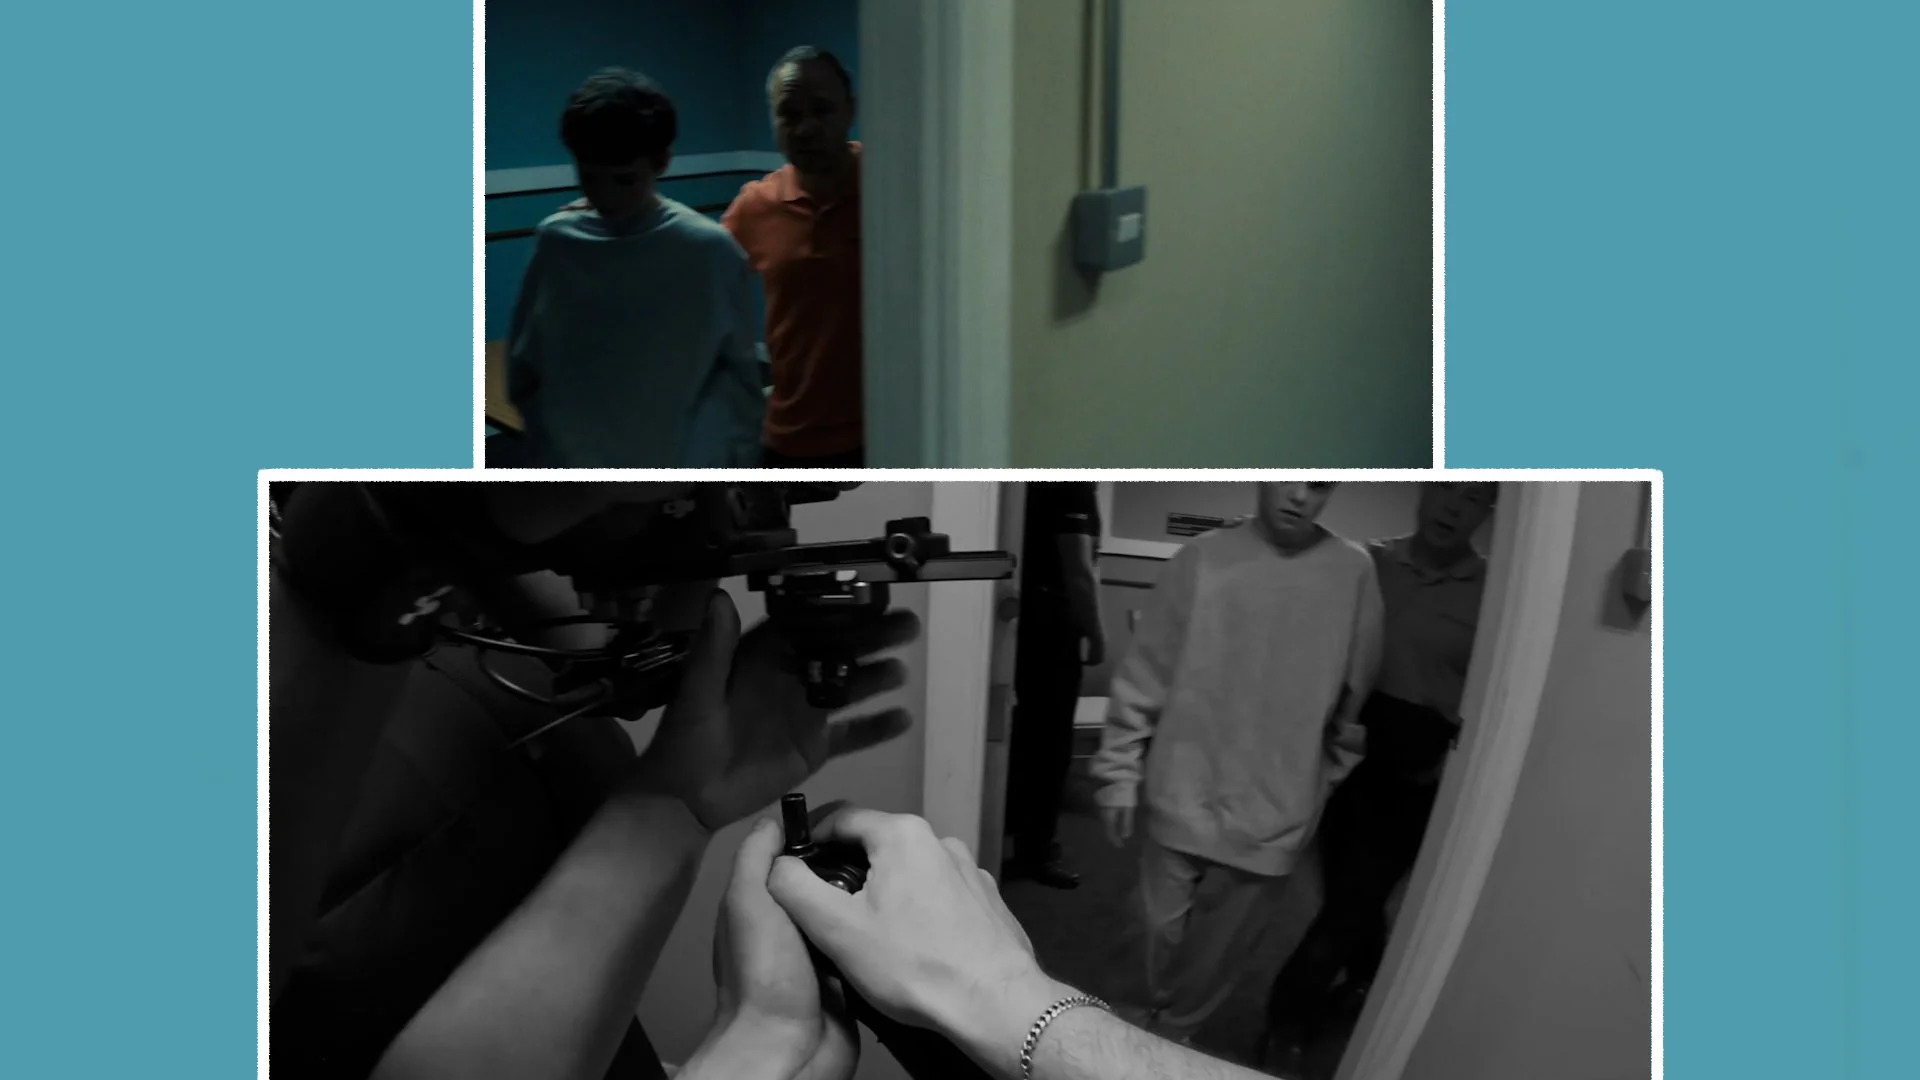
This was done with another handoff. A latch mechanism was rigged onto the 4D’s top handle. Two crew members could then take the propeller section of the drone and attach it to the 4D. Another operator with the Master Wheels could then operate the camera wirelessly while the drone pilot flew it. Before it eventually came down on the other side, where the drone was caught by crew who could finish off the rest of the shot.
CAMERA MOVEMENT - EPISODE 3
Some parts, like this section, involved a high degree of technicality, while other parts, such as episode 3 which took place entirely inside a room were more about the nuances of storytelling.
The challenge was how to keep the camera language engaging and dynamic enough, while at the same time not letting it be distracting or drawing attention to itself.
Rather than making traditional storyboards, Lewis instead created what he called ‘movement plans’ inside the Hollywood Shot Designer app. He broke each take into sections then animated them with keyframes to feel out the beats of the script and what the camera should be doing.
The key was always using the characters, their emotions and the story as motivation for the camera movement.
For example, this section started with a wider two shot. The width of the shot accentuated the awkwardness the characters were feeling at the beginning of this scene. Then as it progresses and they start engaging with each other, the camera starts to slowly and tentatively circle from left to right, getting a bit closer, mimicking the way that the two characters are slowly feeling out each other and getting more comfortable.

LIGHTING
Another challenge when shooting in this 360 degree style was the question of where to place lights.
To add exposure and shape the light Lewis got his team to rig lights to the ceiling. Mainly LED panels like Skypanel S60s or Vortex 8s.
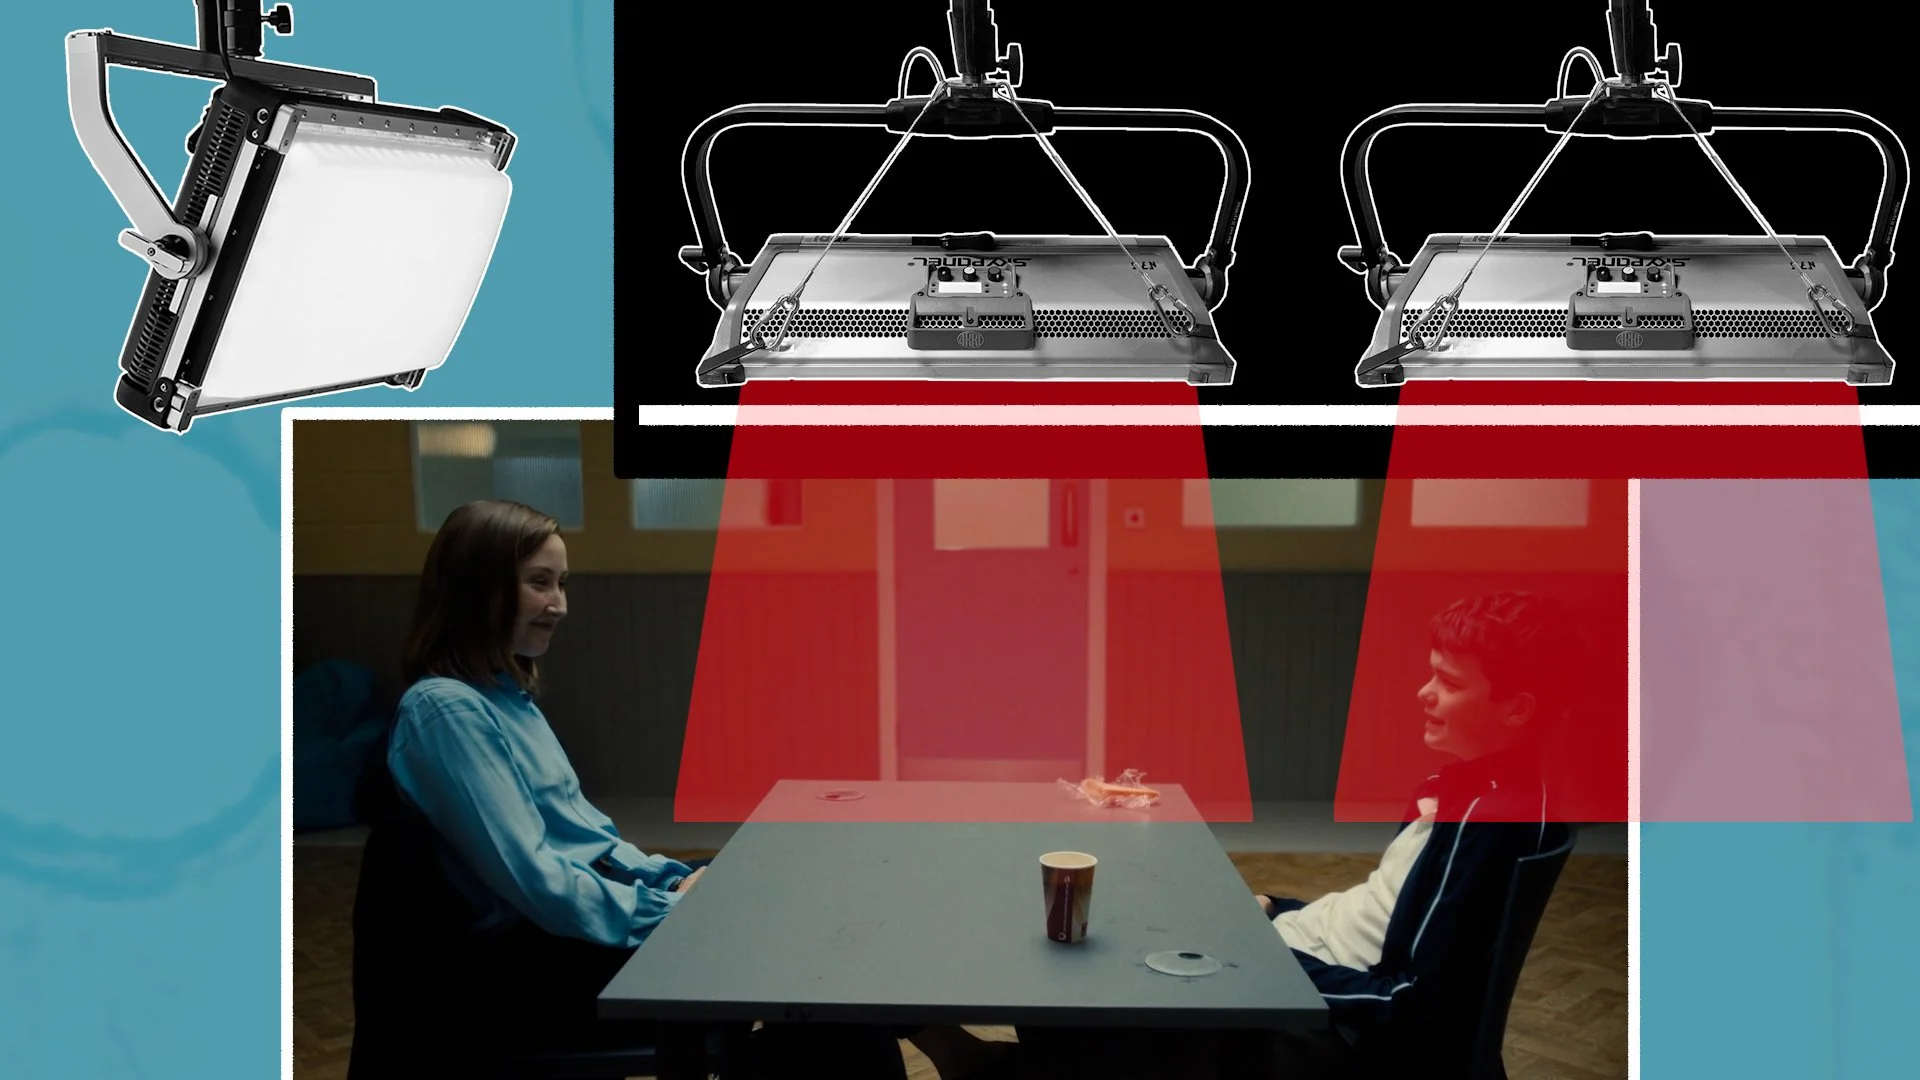
Rigging lights overhead meant the light would fall straight down onto characters. He couldn’t often set up a key light through windows as this would've cast a shadow of the camera operator if they passed through the light beam.
The team also built lots of practical lights, which could be seen in the shot, into the sets - such as controllable LED Astera Titan tubes which were made to look like fluorescents.
Lewis also sought to try to get in an eyelight to better illuminate characters' features whenever possible. One tricky way they did this was by mounting a little Astera Hydra panel behind an A4 sheet of paper on a bulletin board. They kept the light off when the camera saw it, then once the camera moved around onto the lawyer and the paper was out of shot, they could dim the panel up to give the actor more fill light.

Although they were able to shoot in 6K RAW - which on a 1 terabyte card gave them 65 minutes of recording time - preserving the highlights, so that they weren’t blown out to white, and keeping some information in the shadows, so they weren’t crushed to pure black - was still a challenge.
Especially since they would be moving between interiors, with much dimmer lighting, and exteriors which have much brighter light levels. To help balance this they used a Tilta Mirage variable ND system. The strength of this ND can be changed with a gear which can be controlled using a wireless lightweight focus motor.
The loader on the job was tasked with pulling the ND. They could change the ND from 1.5 stops if the environment was darker in an interior to 5 stops if it got brighter - such as when they came outside.
Being able to change the ND meant Lewis could keep a consistent stop of T/2.8 throughout each long take - instead of needing to change the iris to control exposure. The benefit of this was that he could keep the exact same shallow depth of field for the duration of the take.
CONCLUSION
Shooting these long takes was a true team effort by the entire crew and cast: from the actors who could perform the whole piece like a stage production, to the multiple camera operators, the lighting team who would dim lights up and down as they went, and the art team who designed the sets and collaborated on placing the practical fixtures.
Adolescence is a case study in just how much work goes into filmmaking, to try, just for an hour, to suspend the audience’s disbelief and immerse them in the world of the story.